Showing posts with label Breakfast. Show all posts
Monday, July 22, 2019
Ditch the Cereal! {Kid-Friendly Breakfast Ideas}
I might ruffle some feathers a little bit here, but I'm going to state it: Our kids do not need cereal every morning for breakfast. Or ever, honestly. Take a look down the food aisle, or in our pantry cupboards and I'm sorry, but these have become more like dessert and we're serving it every day in a rush to get out the door on time.
I don't know about your kiddos, but many times mine are starving come lunch time. Cereal doesn't exactly keep them full and ready to take on a full morning of learning. Did you know that most cereals are 75% sugar? Therefore, causing our body's energy levels to go through it's own sort of rollercoaster; up and down all throughout the day. Plus, have you ever noticed within your own self, that you crave more sugar and carbs throughout the day once you begin with cereal, pop-tarts, muffins or donuts? Consuming sugar just makes you crave even more sugar.
But, I'm not here to lecture. We're all doing the best we can, I know we are. And when we know better, we can do better. I also understand that there's just not a lot of time in our schedules to prep a bunch of foods. Oh do I get it! We're rushing around in the mornings getting ready and packing lunches just like everyone else, and I'm in the classroom with our kiddos all day too.
I want to give you some ideas for healthier, more filling options for that first meal of the day. These are all kid-friendly because my own girls love them, but they work for us as adults too. Yes, some require some advanced prep work, you can fit this in on the weekends or any time you have a free moment. I know you're busy, I really do, and I also know that if it's important to you, you always find a way to get it done.
There are also times where a quick egg and toast breakfast are what works. We do this often in the mornings and take it on the go. Cooking up an egg takes no longer than it does to pour a bowl of cereal, honestly. And, if your kiddos just really do enjoy that bowl of cereal or whatever it is you have, then I'm going to ask you to at least pair it with some sort of protein like an egg. Help fill their little stomachs up for the morning so they can focus longer and be productive in their day. I think you'll notice an improvement in so many areas.
Let's take a look at a few suggestions:
Healthier Breakfast Options:
Coconut Flour Pancakes
Low-sugar Baked Oatmeal
Quick 2-minute Ham & Egg Bowl Now, everyone has time to make one of these. You can even prep them ahead of time. You could add in chopped up peppers and onions for extra nutrients and flavor. These are great for adults too, not just the kids.
Breakfast Quinoa
Freezer Smoothie Packs These are so versatile! We always use either almond or coconut milk, coconut gives extra healthy fats that are great for the brain and helping to keep our kids full for longer periods of time. You can also add in avocado for extra creaminess without adjusting the taste of the smoothie, the kids won't even notice it's in there! Tossing in a little bit of protein powder or nut butter is great as well.
Buckwheat Pancakes
Veggie and Sausage Frittata You can easily make this for dinner one night or ahead of time on the weekend, and just slice and reheat throughout the week.
Yogurt Parfait My only tip here, is to make sure to avoid sugar laden yogurts. Otherwise our efforts are tossed out the window. There are some better yogurts on the market now sweetened with stevia and such.
Wonton Breakfast Cups
Wednesday, July 3, 2019
Coconut Flour Pancakes
Pancakes are always a favorite for not only breakfast, but dinner time as well. Whether it's due to an allergy, not liking the bloated feeling afterwards or just wanting to experiment with different ingredients; these pancakes are perfect for the whole family!
Regardless of your own particular food beliefs, flour isn't what it used to be. Our society eats a mostly high carbohydrate and processed food diet, and it's just not good. But, that's honestly for a whole 'nother discussion.
I have tried many recipes for grain free and healthier pancakes, and I have finally found the perfect recipe I want to include in my own family's rotation going forward. You know those banana/egg/oat pancakes that everyone was going crazy for not long ago? Yeah, those have nothing on these.
These are a closer consistency and texture to your standard all purpose flour pancake, and they do not taste strongly of coconut. I won't lie, there's a hint of taste, but it's not overpowering. Especially, if you were to slather these in butter and enjoy with some syrup (real maple, please!), homemade jam or almond butter as I did.
Try them, see what you think. They are not complicated at all and use wholesome ingredients. Ingredients which will help keep you feeling satiated much longer than your typical American pancake recipe.
Coconut Flour Pancakes
Ingredients:
2 eggs
1/2 cup heavy whipping cream
1 tsp vanilla extract
1/2 tablespoon Swerve sugar substitute (or honey)
1/4 cup coconut flour
1/2 tsp baking soda
1/4 tsp Himalayan salt
Butter
Directions:
In a small bowl, mix together eggs, cream, vanilla and Swerve. In a separate bowl, combine coconut flour, baking soda and salt. Add wet ingredients into the dry, and stir together.
Melt about 1 tablespoon of butter onto a skillet or griddle over medium heat. Pour batter into the skillet to form pancakes. Be careful not to make too big, they can be difficult to flip the bigger they are. Cook on each side for 2 minutes, or until golden brown.
Makes 6-7 pancakes. Top pancakes with desired syrup or toppings.
Sunday, August 21, 2016
Low Sugar Baked Oatmeal
Baked oatmeal is one of my favorite things to have for breakfast, especially when the weather gets cooler. I have a favorite recipe I usually make, but it's not as healthy as it could be. It's really good! But probably not the best nutrition wise. I've never been one to exercise, honestly, I can't remember ever and I wasn't all that into sports while growing up. I'm learning as I get older, if I'm going to keep cooking and baking like I love to; something has to give. This summer I've started running, using the Couch to 5k program, and am finding that I really love it. I'm currently on week five of the program and plan to run my first ever 5k in October. For the past few years I've supported my family as they participate in this particular 5k event benefiting our local school system, but now it's my turn to join in and do something for myself. I'm excited to run along side with them!
So with all of that going on, I'm also focusing on my nutrition a little more now. I do strive to feed our family with healthy foods as much as possible, but I know there's always room for improvement. I've got a sweet tooth and trying to curb that is probably my number one focus right now.
As we're heading back into another school year, it's also time to get back to meal prepping more and stocking the freezer with meal components. This can help make my days go so much more smoothly than if I didn't. I made a small batch of these oatmeal cups last week, just in case they didn't turn out like I wanted. They freeze wonderfully and I can quickly thaw a couple in the morning for a quick breakfast.
They baked up just as well as my other recipe did, the texture was spot on and they remove easily from the muffin tins. As I've focused on cutting back on sugar, I'm finding it doesn't take much to satisfy me anymore. You will notice that these are not as sweet, but definitely sweet enough. Especially with your choice of seasonal fruit on top, these peaches in particular are like candy right now. So juicy and sweet, I don't want to take away from that lovely flavor. And they are filling, two for breakfast in the morning plus a little fruit on top, is plenty to keep me satisfied. Feel free to add your desired toppings into the oatmeal cups before baking, I personally love being able to customize as we eat them. Sprinkled with a few almonds, walnuts or pecans before you eat and you've got yourself one heck of a breakfast bowl!
Low Sugar Baked Oatmeal
Ingredients:
1 cup unsweetened applesauce
1 egg
1 tsp vanilla
1-2 tbsp honey or pure maple syrup (adjust according to your taste)
1-1/4 cups old fashioned oats
3/4 tsp baking powder
pinch of salt
1 tbsp cinnamon
1/2 cup almond milk or regular milk
Directions:
Preheat oven to 350 degrees. Lightly grease a muffin tin and set aside.
In a large bowl, combine together applesauce, egg, vanilla and honey or maple syrup. Mix in oats, baking powder, salt and cinnamon. Lastly, add in milk and stir well to combine.
Using a large spoon or cookie scoop, distribute batter into wells of muffin tin, filling 3/4 full. Bake in oven for 20 minutes, or until centers are set.
Remove from oven and let cool for a few minutes before removing to eat. Enjoy with desired fruit or nut toppings.
*If freezing, let cups cool completely before placing into freezer bags or container. Make sure to label with contents and then store in freezer. When ready to enjoy, let thaw a little if possible before reheating. Microwave or warm in oven.
Makes 6-8 oatmeal cups
Wednesday, July 27, 2016
Buckwheat Pancakes
Breakfast around here hasn't been too exciting this summer. Lots of toast, eggs and smoothies. As much as I love to cook, mom gets tired of preparing a full on meal three times a day plus all of those dishes that go along with it. I've only made muffins once and pancakes maybe a few times. With the weather cooling down just a tad this week, I thought I'd treat the kiddos to pancakes.
They're not your typical hot cake. I like experimenting with new ingredients, and flour being one of them. Unlike some, buckwheat flour is one that can easily be adaptable to most recipes that call for regular flour. It definitely has a unique flavor, offering a bit of a nutty taste to your baked goods. Buckwheat is actually a fruit that is similar to wild rhubarb,so although it's treated as a grain, it's actually gluten free. As far as baking entirely gluten free with it, I'm not familiar with it at all. I do however, love how it amps up the nutritional value in our foods, so for that I will keep a small supply on hand at all times.
When I first started making these for the girls, they were a little unsure of the dark color, which I honestly expected. I like keeping the recipe with half all-purpose flour, mainly to not turn them away. Maybe someday we'll try whole wheat and see what we think. The cinnamon adds a wonderful flavor, they smell like a gingersnap or molasses cookie almost. After the first bite, each girl said they taste just like our "normal" pancakes. Sometimes I'll sprinkle in a few mini chocolate chips while I'm cooking them over the stove top. I prefer mine with a bit of homemade jam smeared over top.
It won't be long and I'll be in back to school mode again, only one more month to be exact. I anticipate filling the freezer with a couple batches of these to help ease back into our morning routine. I know these, along with some fresh fruit will be what my girls need to keep their bellies full until lunch.
Buckwheat Pancakes
Ingredients:
1 cup buckwheat flour
1 cup all-purpose flour
1/2 tsp baking soda
1 tsp baking powder
1/2 tsp salt
1/2 tsp cinnamon
1/4 cup coconut oil, melted and cooled
2 eggs
1-1/2 cups milk
Directions:
In a bowl, whisk together both flours, baking soda, baking powder, salt and cinnamon. Add in oil, eggs and milk and whisk until well combined.
Heat a skillet on the stove over medium heat. Spoon batter onto skillet and let cook until small bubbles form around the edges, flip pancake and let cook until browned. Remove from skillet and repeat with remaining batter.
Serve pancakes warm with maple syrup or jam. Makes 8 big pancakes
Wednesday, December 9, 2015
Orange Cranberry Rolls
A couple years ago at Christmas time, I advertised that I was taking orders for cinnamon rolls. I was still working from home as a child care provider and then also decorating cakes/cupcakes on the weekends. Cinnamon rolls happened to be one of the best sellers at my farmers' market booth and I got to thinking, who wouldn't love to wake up on Christmas morning to fresh baked sweet rolls?!
So it was a go, and a big hit at that. My husband was working second shift at the time, so I spent the evening mixing up close to 200 rolls. They rose over night and then on Christmas Eve. morning, I baked them for customers to pick up. All they would have to do is simply reheat the next day and enjoy.
I wish I had time to do it again this year, because I would definitely offer in addition to the cinnamon rolls, my caramel pecan and these new orange cranberry. Next year for sure!
I love a good baking project and sweet rolls are always a welcomed treat in my house. Sundays are my favorite day for baking. I try to have all of our work done around the house, so I can use the day for baking and preparing meals for the upcoming week. I had originally planned to bake scones but after some thinking, I quickly decided to give the sweet roll version a try.
I used my favorite cinnamon roll recipe and just adapted it to the orange and cranberry flavors. Everyone in the house loved the results! Even if a couple of them picked out the cranberries ha! They still went for the citrus flavor. These might have to be a new favorite when it comes to special breakfast treats.
Orange Cranberry Rolls
Ingredients:
2-1/4 tsp active dry yeast
1 cup milk, room temp
2 eggs
5 tbsp melted butter
1/2 cup sugar
1 tsp salt
4-1/2 cup flour
1 tsp orange zest
for the filling:
2 tbsp melted butter
1/3 cup brown sugar
1/4 cup dried cranberries
zest of one orange
for the buttercream:
1 stick butter, softened
1 lb. powdered sugar
Zest and juice of 1/2 orange
splash of milk, if needed for additional thinning
Directions:
In the bowl of a stand mixer, dissolve yeast into milk and let sit for 5 minutes. Add in eggs, melted butter, sugar and salt. Mix to combine. Gradually add in flour, you might need to add in up to one half cup more. Mix in orange zest. Once dough has come together, switch to the dough hook and knead for five minutes. Remove dough and place into a large, lightly oiled bowl. Cover with a towel and let rise in a warm spot for one hour.
When dough is ready, punch down and turn over onto a well floured surface. Using a rolling pin, roll dough out into a large rectangle, about 18x16 inches. With a pastry brush, spread melted butter on dough. Sprinkle with brown sugar, cranberries and orange zest.. Starting with the long side, roll up the dough, making sure to pinch seams to seal. Using a sharp knife, cut into 15 slices. Place rolls into greased baking pans.
Cover and let rise for another 30 minutes. Preheat oven to 350 degrees. When ready to bake, place in oven and bake for 25-30 minutes. Remove from oven and let cool while you mix up buttercream.
To prepare buttercream: In a large bowl, cream together butter, orange zest and juice. Gradually add in powdered sugar, mixing together well. Add in milk by the teaspoon, in small increments, just until the buttercream has reached your desired consistency. Frost rolls with buttercream when done.
Wednesday, November 11, 2015
Yogurt Breakfast Parfait
I know mornings are rushed for all of us; I get up early and start in on the packing of lunches and all that good stuff. But it's also important to grab a bite to eat for breakfast. I need to make sure I fuel my body for a busy day with preschoolers.
Depending on how quickly I get going, I have more time some days than others. There's also days where I'm not so hungry, yet I know if I leave the house without anything, my stomach will be growling by 10:00.
Not so much even a recipe, but I love having these parfaits for my morning meal. I'm not generally a big eater so these will keep me feeling full until lunch time. I love making a batch of granola on the weekends to last us through the week or so, even the kiddos enjoy these for breakfast or snacks.
While I've tried making my own yogurt before, it's just not feasible right now for me to do so. We love purchasing this particular brand, it's locally made and we've even had a chance to visit their dairy where they produce their products.
During the summer months we love fresh berries or peaches in our parfaits, but now that it's winter, we love adding pomegranate seeds. They offer a nice tartness and crunch plus they're so good for you!
What is your go-to breakfast in the mornings?
Yogurt Breakfast Parfaits
Ingredients:
1 cup yogurt
1/3 cup granola
pomegranate seeds, or other desired fruit
Directions:
Layer ingredients into a cup or bowl as follows: yogurt, granola and lastly, fruit. Enjoy right away. Serves 1
Friday, July 17, 2015
Bacon, Egg and Tomato Sandwich
For the past seven weeks or so, I've been taking an continuing ed class at our local community college. My other classes were always later in the evening, giving me ample time to prepare dinner. Now we're finding ourselves getting home from dance practice at 5 or after and seriously rushing to get dinner on the table so I can leave and be in class by 6:00.
If it weren't for simple meals and the help from each family member, we probably wouldn't be able to make this work so well. Or else we'd be tempted to eat out those two nights each week. This season in life is crazy busy but hey, we're making the best of it. I'm sure so many of you can relate all too well.
So these happened to be dinner last night. Ridiculously simple, yet so good! I hope you're realizing good food doesn't always have to be time consuming and complicated.
I quickly pan fried a few small potatoes from the farmers market in a tiny bit of bacon grease and they made for a delicious side. The girls of course added some fresh blueberries to their plate. These made for a great dinner when we're craving hearty breakfast food. You can certainly keep these in mind for your breakfast during the week or on the weekend.
Bacon, Egg and Tomato Sandwich
Ingredients:
1 lb bacon
Eggs
Sliced tomato
Cheese, if desired
Ciabatta buns
Directions:
In a large skillet, cook bacon over medium-high heat until browned and cooked through. Transfer to a plate lined with paper towels and set aside.
Prepare eggs in another small skillet, fry in a bit of bacon grease if desired.
While eggs are cooking, start toasting buns. When eggs are ready, layer each toasted bun with an egg, bacon and tomato. Add cheese if desired.
Serve with pan fried potatoes and fresh fruit.
Friday, July 3, 2015
Wonton Breakfast Cups
Every so often we need to change up the meal plan and have brinner, breakfast for dinner. During bowling season when the hubby is gone on Monday nights the girls and I will do this. Many times it's pancakes or waffles, eggs and bacon. But it's also fun to make new dishes too.
We experimented with these mini omelets a few summers ago and will make them on occasion. I thought this time around it'd be fun to incorporate the wontons, for a little extra crunch.
These were easy enough to whip up quickly and also for the kids to help. It gave them a chance to help fill each of the wells in the muffin tin with our chosen ingredients. I always think they eat a little better when they can help.
As for the filling. That's completely up to you. Use any of your favorite omelet fillings or whatever you have on hand. It all works and anything goes!
Wonton Breakfast Cups
Ingredients:
1/2 lb. pork sausage
6 eggs
pinch of salt and pepper
1/2 cup diced green pepper
1/4 cup grated cheese
12 wonton wrappers, small
Directions:
Preheat oven to 350 degrees.
Brown sausage in skillet over medium heat, until no longer pink. Drain and return back to pan, set aside.
Lightly grease wells of a muffin pan with oil. Place one wonton wrapper into each well.
Whisk eggs until frothy in a small bowl and add salt and pepper. Pour eggs into each wonton, filling about 3/4 full. It may work easier to pour eggs using a spouted measuring glass.
Sprinkle in desired toppings; peppers, sausage and cheese. Bake in oven for 15 minutes, just until eggs are set and wrappers are browned.
Remove from oven, let cool for a few minutes before serving. Makes 12
Wednesday, June 3, 2015
Strawberry Rhubarb Scones
Rhubarb has been making an appearance at the markets since they opened one month ago. It's about time I got my hands on some.
I've also come to really like making scones, they were always one thing that intimidated me. I'm not sure why because they are one of the easiest baked goods to make.
I love when I can enjoy time in the kitchen on Sundays after church and lunch with the family for some leisurely baking time. I'm not feeling rushed and can take my time making whatever my little heart desires. This time, it was scones. Strawberry rhubarb scones, because the two go so well together.
Served with a little strawberry jam, they make for a special breakfast. You can certainly make a simple powdered sugar and milk glaze to drizzle on top, but I really love the jam. They're also lovely plain, if you're rushed for time in the morning, just grab and go.
You'll be happy to know scones also freeze well. After they have cooled, place them into a large container or freezer bag and store in the freezer. When you're feeling like having a scone, simply let thaw and enjoy!
Strawberry Rhubarb Scones
Ingredients:
1 cup whole wheat pastry flour
1-1/2 cups all-purpose flour
1/2 cup sugar
1 tsp baking powder
1/2 tsp baking soda
1/2 tsp salt
1 stick butter, cubed
3/4 cup heavy cream
1 egg
1 cup diced strawberries
1/2 cup diced rhubarb
Directions:
Preheat oven to 400 degrees.
In a large bowl, combine both flours, sugar, baking powder, baking soda and salt. Cut in butter using a pastry blender until mixture resembles coarse crumbs. Pour in heavy cream and egg and mix together well.
Using a wooden spoon, mix in strawberries and rhubarb. Turn over onto a floured surface and knead dough until everything comes together.
With a floured rolling pin, roll dough out into a circle. You may make this a thick as you would like. Cut dough into triangle shapes with a sharp knife.
Transfer scones to baking sheets lined with silicone baking mats. Bake in oven for 15 minutes, or until scones are set and lightly browned. Remove from oven and let cool for at least five minutes before removing.
Serve warm, with jam if desired. Makes 12 scones.
Friday, March 13, 2015
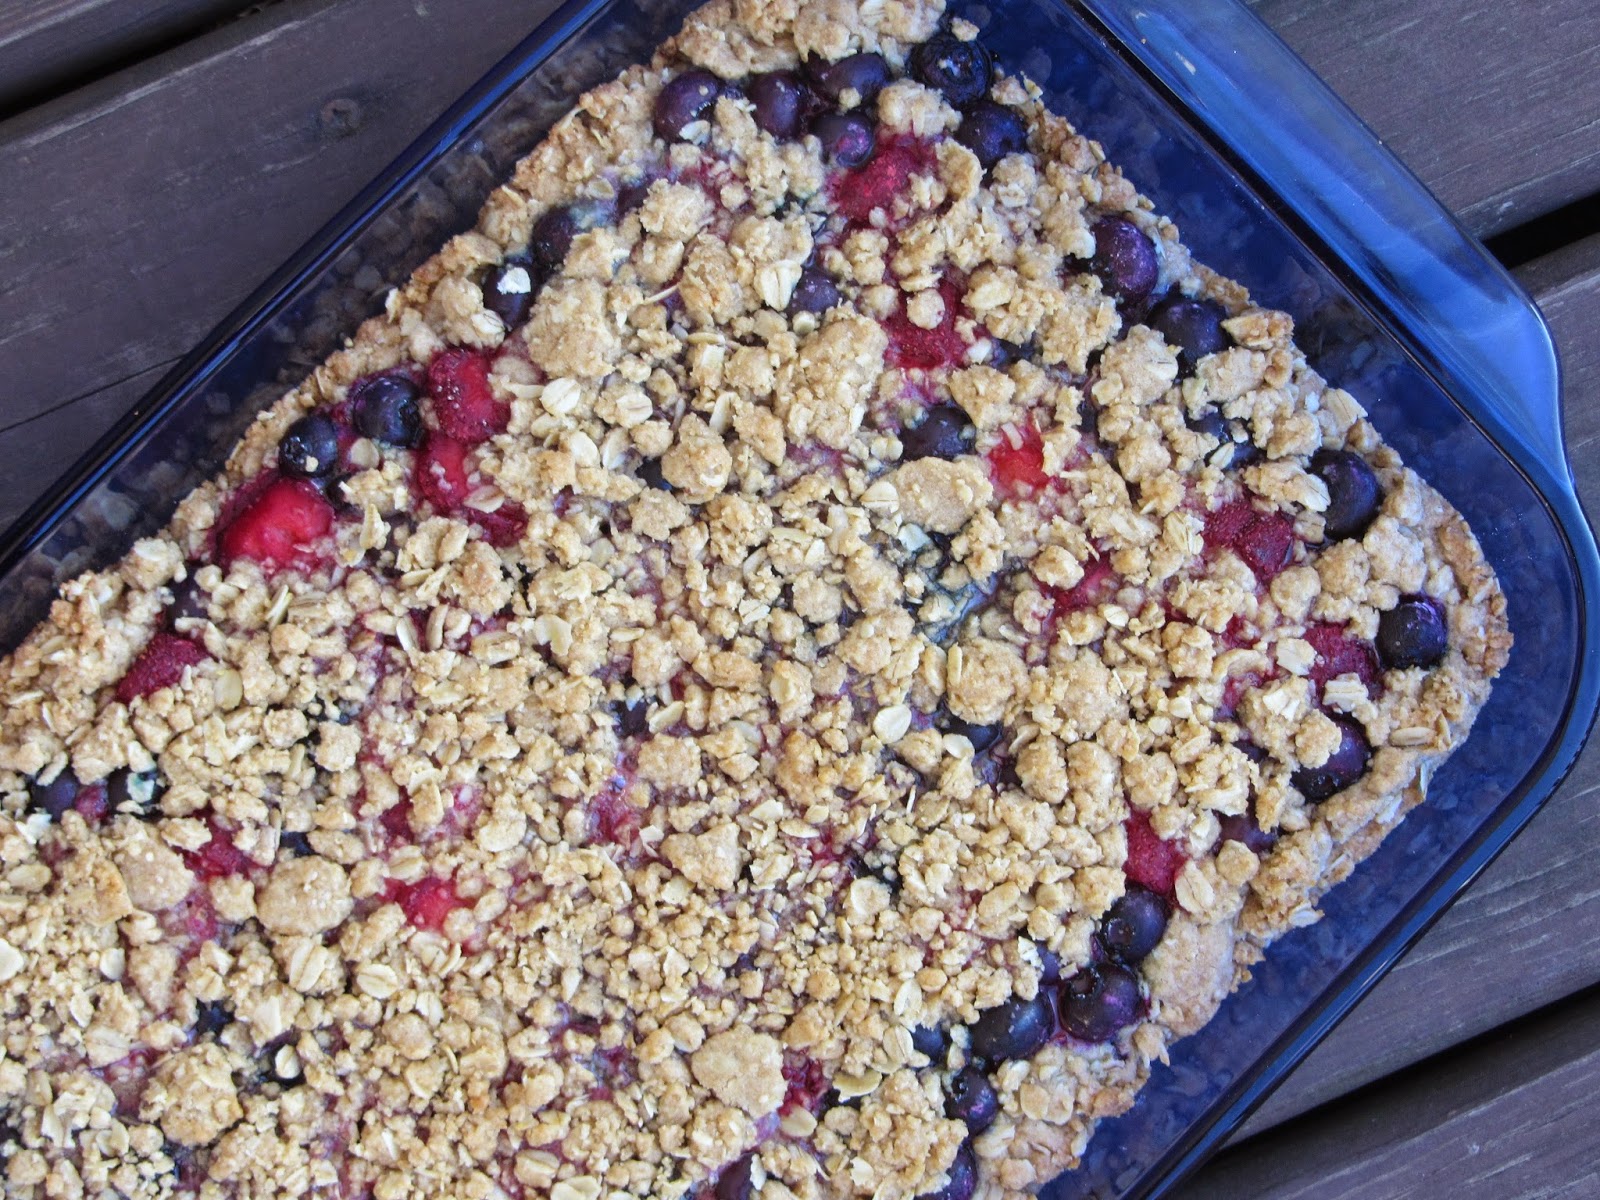
Freezer Fridays: Berry Oatmeal Bars
Whelp, it's officially spring break! I am so thrilled to have a week off from work. I love having the extra time with my girls and as always, am hoping to get some things accomplished around the house. The weather has been absolutely gorgeous this week, let's hope it continues!
I made these bars on Sunday, I wanted a new breakfast bar to stash away in the freezer. I've made some before using our favorite homemade jams but this time wanted to incorporate frozen berries I had on hand. Making them even more nutritious.
By incorporating whole wheat flour, oats, berries and little sugar; I can feel good about letting the kids have one for breakfast. Or snack. They certainly have to be better than donuts or some cereals.
Of course, as always, one batch doesn't seem to last very long. Good thing I got them in the freezer quickly. As I am sure I'll be making more over my break!
Berry Oatmeal Bars
Ingredients:
1 cup whole wheat pastry flour
1 cup all purpose flour
2 cups old fashioned oats
1 cup brown sugar, packed
1 tsp baking soda
1/4 tsp salt
2 sticks butter,melted
2 cups frozen blueberries
1 cup frozen sliced strawberries
1 tbsp corn starch
1/4 cup sugar
Directions:
In a large bowl, combine both flours, oats, brown sugar, baking soda and salt. Add in melted butter and mix until crumbly. Press 2/3 of mixture into a 9x13 inch baking pan and set aside.
In a small bowl, toss the berries with corn starch and sugar. Sprinkle fruit evenly over the crust. Distribute the remaining oat mixture over top of the berries.
Bake at 350 degrees for 30-35 minutes. Remove from oven and let cool before cutting. Depending on the size of your bars, makes 12.
Freezing instructions: After bars are cooled and cut, wrap individually in plastic wrap. Lay each bar on a pan and place into freezer for at least one hour to flash freeze. Then transfer to a container or large freezer bag to place in freezer until ready to eat. Simply remove from freezer and let thaw for a bit before eating.
Tuesday, December 23, 2014
Ham and Egg Breakfast Bake
Well I really can't believe Christmas is already here. Maybe it's the lack of snow here in Iowa or just the fact that we've been so busy. Regardless, I am excited to be off work for almost two weeks! I'm looking forward to spending the holiday with our families, relaxing and who knows, maybe even doing a little freezer cooking.
Christmas morning I always like to have something special for us to eat after we open presents. The usual cinnamon rolls or waffles are favorites but the hubby likes more savory dishes. So I created this with him in mind.
I combined some of his favorites: ham and cheese. And it can even be made ahead of time which I love. Christmas eve night toss everything together in a casserole dish and let it set in the fridge overnight. Then while you're busy opening presents in the morning, your breakfast can be baking away in the oven. Perfect if you ask me!
Ham and Egg Breakfast Bake
Ingredients:
4 slices thick deli ham, cut into small pieces
4 English muffins, cut into chunks
6 eggs
1 cup milk
Pinch of salt and pepper
1/2 tsp garlic powder
1/2 cup grated cheddar cheese
Directions:
In a 2 qt. casserole dish place two slices of ham in bottom of dish. Layer muffin pieces on top.
In a medium bowl whisk together eggs, milk and seasonings. Pour over the mixture and sprinkle cheese over top. Cover with foil and let set in fridge overnight or at least 4 hours.
Remove from fridge when ready to bake. Bake covered at 350 degrees for 30 mins. Then remove foil and bake for another 10-15 mins. or until center is set. Remove from oven and serve warm.
Tuesday, December 2, 2014
Apple Spiced Granola
Well I sure hope you and your family had a wonderful Thanksgiving holiday. We kept things pretty low key around here. We were with the hubby's family part of the day and mine in the evening. Friday was the perfect day since we all still had the day off. The majority of the day was spent being lazy and watching movies, something that doesn't happen often enough! It was a much needed time of relaxation for all of us.
Granola is a favorite around here. I always like experimenting with different variations and flavors. We like it to snack on, as a cereal and especially in our morning yogurt. In this new version I incorporated some of my homemade applesauce. The chunky apples cook in the oven and leave a wonderful soft dried fruit in the granola.
Like usual, most of the time I use whatever we have on hand in the pantry. You can do the same. For extra nutrition, throw chia seeds, flax seed or wheat germ in there as well. It's always better tasting and even more cost effective to make your own granola at home. I can make a large batch for probably about the same price as a small bag costs me in the store.
The problem we always run into in our house is, it just doesn't last long enough. If you've got a good applesauce in the fridge or freezer, try this spiced granola for a yummy new treat!
Apple Spiced Granola
Ingredients:
3 cups old-fashioned oats
1/2 cup slivered almonds
1/2 cup dried cranberries
1/3 cup raw coconut
1 tbsp cinnamon
1 tsp nutmeg
1/4 tsp allspice
pinch of salt
3/4 cup applesauce
1/3 cup oil
1 tbsp maple syrup
1 tsp vanilla extract
Directions:
In a large bowl, combine together all dry ingredients and spices. Mix well. In another bowl, whisk together applesauce, oil, maple syrup and vanilla. Add wet ingredients into the dry and stir to combine.
Pour granola onto a large baking sheet lined with a silicone baking mat or parchment paper. Make sure to evenly distribute. Bake in the oven at 350 degrees for 45 minutes, making sure to turn with a spatula every 15 minutes or so. Let bake until golden brown. Remove from oven, let cool and then transfer to an airtight container.
Monday, October 20, 2014
Stuffed Pancakes
I didn't have a very good plan for dinner as we were heading out the door this morning. I quickly pulled out a package of sausage from the freezer to thaw and decided it was a breakfast for dinner kind of evening. It's one of my favorite nights and I don't think anyone else complained.
We had some fun with our traditional pancakes. I decided to add some of our favorite spreads to the inside and make them sort of like dessert pancakes. Some had a warm, gooey Nutella filling, we tried peanut butter and also Biscoff cookie spread. Almond or any other nut butter would be good, as well as jam. Then lightly dusted with powdered sugar, there's no need for maple syrup here!
Give these a try next time you've got pancakes on your menu, whether it be for breakfast or in the evening like we decided. The kids will love helping and picking out their desired fillings. Feel free to use your own favorite pancake recipe or my go-to version listed below.
Stuffed Pancakes
Ingredients:
2 cups flour
2 tbsp sugar
4 tsp baking powder
1 tsp salt
2 eggs
1/2 cup oil {canola, coconut, etc}
1-1/2 cups milk
Filling options: Nutella, nut butters, Biscoff, jam
Directions:
In a medium sized bowl, combine together all dry ingredients. Add in wet ingredients and mix together well using a whisk.
Preheat a griddle or small pan over the stove. Ladle a small amount of pancake batter onto the pan, place a large dollop of desired filling directly onto pancake. You can try to sort of spread it out a bit, but it's not necessary. Add another small amount of pancake batter on top to cover the filling. Let cook as usual, until browned and pancake is cooked through.
Repeat with remaining batter. Before serving, lightly dust pancakes with powdered sugar if desired.
Friday, September 26, 2014
Freezer Fridays: Spiced Apple Waffles
Waffles are a favorite in our house for breakfast, I usually try to have at least one bag in the freezer at all times. They are quick to reheat in the mornings but never seem to last long enough. A couple weekends ago, I decided it was necessary for us to sleep in and skip one weekend of church service. Mom just needed a break and some relaxation. Of course something special for breakfast was in order. I wasn't surprised when the kids cheered for waffles.
Since apples are in abundance right now, I wanted to incorporate them into our meal. I took my standard waffle recipe and added a little bit of autumn flare to it. We've already got a great apple pancake recipe we love so I knew waffles would be just as good. And they were.
They've got just the right amount of cinnamon spice and taste wonderful with maple syrup drizzled on top. You know that whipped maple butter I made the other day? It will be the perfect addition to these waffles. If you're like me at all and adding tons of apple recipe ideas to your menu plans, make sure to give this one a try. Toss a bag or two in the freezer for weekday mornings, your family will thank you!
Spiced Apple Waffles
Ingredients:
1-3/4 cups all purpose flour {many times I use half whole wheat flour and no one notices the difference}
1 tbsp baking powder
1/4 tsp salt
1 tsp cinnamon
1/2 tsp nutmeg
2 eggs
1-3/4 cup milk
1/2 cup oil {coconut, canola, etc}
1 grated apple
Directions:
In a bowl whisk together all dry ingredients. Add in eggs, milk and oil. Mix together until combined. Add in grated apple and stir well.
Add batter to a lightly greased waffle maker and cook according to manufacturer's directions. Once done, turn waffles onto a plate and repeat with remaining batter. When ready to serve, lightly dust with cinnamon if desired and drizzle maple syrup over top.
For freezing: place waffles onto a large cookie sheet and flash freeze for one hour, or until solid. Transfer to large freezer bags. Make sure to label with date and contents. When ready to enjoy, simply reheat in the toaster.
Wednesday, September 3, 2014
Two Minute Ham & Egg Bowl
I shared this picture, along with the easy instructions on the Facebook page recently; but I felt the need to share again in an actual post. These help to make our mornings a little easier. It's a very simple and healthy breakfast and I love the fact that I can prepare something nourishing for my family in such little time. Heck, I could even bring along the ingredients to work with me and have one for lunch if I wanted.
I didn't have any individual sized ramekins; while mine is still pretty small, you can certainly make this using only one egg and thus decrease your cooking time to only one minute total. No matter how rushed your mornings are, I think everyone can take two minutes and enjoy a dish of these ham and eggs. You'll have a great start to your morning and feel full for hours.
2 Minute Ham & Egg Bowl
Ingredients:
1 slice deli shaved ham
2 eggs
small handful of cheese
salt and pepper, to taste
Directions:
Place ham in bottom of a small ramekin. Add eggs on top, do not stir. Microwave for 45 seconds. Remove from microwave and stir. Place back in microwave and cook for an additional 45 seconds. Season with salt, pepper and sprinkle cheese on top if desired. Enjoy!
___________________________________________________________________
Coming up on the blog later this week: a new Freezer Friday recipe and a review of the new 100 Days of Real Food cookbook including a recipe straight from the book! Stay tuned!
Friday, August 29, 2014
Freezer Fridays: Pumpkin Zucchini Scones
Last weekend it was certainly very hot and humid here in Iowa. Typical summer weather for us, except it always waits to do this sort of thing after the kids are in school and the pools have all closed for the season. Go figure! But hey, we're just used to it. I really had no plan to do any sort of baking, but we had some big zucchinis on our table that needed used up. Oh and one lone can of pumpkin in my pantry.
These were a total experiment and I'm so glad I decided to take a chance on them. Made with whole wheat flour, pumpkin, zucchini and sweetened only with a bit of honey; I'd say they make for a pretty healthy breakfast option. Since they aren't very sweet I did spruce them up with a little icing drizzle, but you can leave that off if you wish.
Honestly, I wasn't sure what the kids would think of these. Sometimes they don't like my new creations. They surprised me though and kept coming back for more. I froze half of the batch and left the other half on the counter, the container was gone within a day. That tells me they're a keeper!
Pumpkin Zucchini Scones
Ingredients:
1-1/2 cups whole wheat flour
1-1/2 cups all purpose flour
2 tsp baking powder
1/2 tsp baking soda
1/2 tsp salt
1 stick butter, cubed
1 egg yolk
3 tbsp honey
1/2 tsp vanilla
3/4 cup shredded zucchini
1 cup pumpkin puree
1/3 cup buttermilk
Icing:
1 cup powdered sugar
1/4 tsp vanilla
splash of milk, for thinning
Directions:
In a large bowl, combine egg yolk, honey, vanilla, zucchini, pumpkin and buttermilk. Mix together well.
In another bowl, combine all dry ingredients. Using a pastry blender, cut in butter until mixture is crumbly. Then add wet ingredients into the dry and mix just until combined.
Turn dough onto a lightly flour surface and knead a few times. Add a little bit of flour in if needed. Using a rolling pin, roll dough into a large circle or make into two circles if needed. Cut into wedges. I made some of mine smaller for the kids. You should get about 18.
Place scones onto a baking sheet that's been lined with a silicone baking mat or parchment paper. Bake at 350 degrees for 20 minutes or until turning golden brown. Remove from oven to let cool.
To make icing: combine all ingredients into a bowl and mix well. Drizzle icing immediately over the scones.
These also freeze well, flash freeze on a baking sheet before placing in a freezer bag. Thaw and reheat when ready to enjoy.
Labels:
Breakfast,
Freezer Fridays,
Pumpkin,
Scones,
Zucchini
Tuesday, July 29, 2014
Mini Baked Oatmeal Cups
Even though I absolutely love summer, the scorching hot days spent relaxing by the water and soaking up the sunshine are my favorite. I am sort of looking forward to those cool, crisp mornings when school starts. Those mornings when we reach for a bowl of hot oatmeal to warm us up as we leave the house. This particular oatmeal.
It's my favorite, sweetened with brown sugar and cinnamon; I love tossing in a handful of raisins and maybe even some pecans. Or some days I'll reach for whatever fruit we have in the fridge or freezer. It warms me up and keeps me feeling full all morning long.
Most of the time I'll bake up a small 8x8-inch pan and then enjoy the leftovers throughout the week. This morning I tried something a little different though. Instead of baking in one pan, I divided the mixture between the wells of a muffin pan. Brilliant, right? Then I can take one or two from the freezer as I wish and not feel like I have to eat oatmeal for an entire week. Not that it really ever lasts that long.
I think I like this version much better and will continue to bake it this way. Everyone can add their own favorite toppings and be satisfied.
Mini Baked Oatmeal Cups
Ingredients:
3 cups old-fashioned oats
1 cup brown sugar
3 tsp cinnamon
2 tsp baking powder
1/2 tsp salt
1 cup milk
2 eggs
1 tsp vanilla
1 stick butter, melted
Directions:
In a large bowl, combine all dry ingredients together. Add in milk, eggs, vanilla and melted butter. Stir together. Using an ice cream scoop, drop batter into wells of a muffin pan. Filling until 3/4 full. * I did not use liners but if you would rather, you can certainly use those. Foil or silicone might be your best options.
Bake at 350 degrees for 20 minutes. Remove from oven and let cool completely before trying to remove from pan.
For freezing: Once completely cooled, run a knife along the edges of each well and carefully remove oatmeal cup. Set onto a baking sheet and freeze for one hour. Then transfer to a freezer bag that has been dated and labeled with contents. Be sure to remove all air and seal shut. Place into freezer until ready to use.
When ready to enjoy, thaw overnight in the fridge and then reheat in the microwave for one minute or until warm. You could also reheat in the oven or toaster oven. Serve with desired toppings and a little extra milk.
Makes 12 oatmeal cups
Tuesday, July 22, 2014
Freezer Waffles
Waffles used to be something we only made on the weekends when I had more time to devote to our early morning meal. In the past few years though, it's been convenient for me to prepare a triple batch on Saturday mornings and then freeze all the extras. That way we can pull out what we need throughout the week and simply reheat in the toaster.
When I first became a mom we would purchase a big box of waffles from our local Sam's Club, it really was a reasonable price for all of those waffles we would get. But then I discovered just how simple it is to make your own. And how much better they taste too. And better for you.
We have quite a few breakfast items I like to have stocked in the freezer and waffles are definitely top of the list. I always like trying new variations, but you can't beat a basic waffle with maple syrup. We've got school starting in less than one month so I surely will have as many of these stashed away as possible for those rushed mornings.
Here are just a few variations that we have loved:
Easy Homemade Waffles
Blueberry Muffin Waffles
Overnight Oatmeal Waffles
Freezer directions: Once you have prepared your choice of waffles and they have cooled, place them in a single layer onto a baking sheet. Put into the freezer for about one hour, or until frozen. Then you can transfer to a large freezer bag. This way they will not stick together. Store in freezer until ready to use.
When ready to enjoy, remove desired number of waffles and reheat in the toaster.
Tuesday, July 15, 2014
Cinnamon Rolls
Our family enjoyed a little weekend getaway along the river with my parents. Unfortunately the area has gotten so much rain this summer and the river is still high that we were not able to get out on the water. We did however have a relaxing three days up there and I personally enjoyed being "unplugged" from most technology.
I usually like to help my mom with the preparation of our meals when we go up there. These homemade cinnamon rolls were part of our breakfast one morning. I made it easy on myself by freezing pans of rolls last Thursday so we could bring them along.
I actually do this quite often. If I'm going to take the time to make cinnamon rolls, I might as well make at least a double batch and store extras in the freezer. You'll never know the difference and it will save me so much time in the end. You can even prepare your buttercream frosting and divide that into small baggies to freeze as well. Then you've really got everything you need for a fresh pan of cinnamon rolls for those lazy weekend mornings.
Cinnamon Rolls
Ingredients:
2-1/4 tsp active dry yeast
1 cup milk, room temp
2 eggs
5 tbsp melted butter
1/2 cup sugar
1 tsp salt
4-1/2 cup flour
for the filling:
1 tbsp melted butter
1/3 cup sugar
1 tsp cinnamon
for the buttercream:
1 stick butter, softened
1 lb. powdered sugar
1/2 tsp vanilla extract
milk for thinning
Directions:
In the bowl of a stand mixer, dissolve yeast into milk and let sit for 5 minutes. Add in eggs, melted butter, sugar and salt. Mix to combine. Gradually add in flour, you might need to add in up to one half cup more. Once dough has come together, switch to the dough hook and knead for five minutes. Remove dough and place into a large, lightly oiled bowl. Cover with a towel and let rise in a warm spot for one hour.
When dough is ready, punch down and turn over onto a well floured surface. Using a rolling pin, roll dough out into a large rectangle, about 18x16 inches. With a pastry brush, spread melted butter on dough. Sprinkle with sugar and cinnamon. Starting with the long side, roll up the dough, making sure to pinch seams to seal. Using a sharp knife, cut into 15 slices.
To prepare for the freezer: Place rolls onto prepared baking dishes, I used foil pans. Then cover with both a layer of saran wrap and foil. Label and date the pans and place into the freezer immediately. When ready to use, thaw overnight in the fridge. Remove from fridge and allow to rise for at least 30 minutes, or longer if possible. Then bake at 350 degrees for 25-30 mins.
To make buttercream: In a large bowl, cream together butter and vanilla. Gradually add in powdered sugar, mixing together well. Add in milk by the tablespoon, in small increments, just until the buttercream has reached your desired consistency. Frost rolls with buttercream when done.
You may also transfer frosting to small baggies for the freezer. Simply fill the bags with frosting, seal shut and smooth until flat. Place with cinnamon rolls in the freezer until ready to use.
Friday, July 11, 2014
Banana Chocolate Chip Pancake Bites
These mini pancake bites are probably one of our favorites to have on hand for rushed mornings. The kids just love them, they're small for their little hands and can be easily dunked into syrup. I posted about them almost two years ago here. We love the ones with sausage inside, I think most everyone will agree, the sausage/syrup combo is just great.
But this time around, I wanted to try something a little different. Banana and chocolate chip are always a great combination and wouldn't necessarily require the use of maple syrup. So that's the route we took.
They turned out to be a hit. I was right, they're definitely sweet enough we didn't miss the syrup. I made some without chocolate chips as well, just in case anyone wanted them plain.
You can substitute half whole wheat flour if you'd like, I do that quite often and no one can tell. If there's one item you should definitely make for easy breakfast, I recommend pancake bites. They're so fun for the kids and you can add just about any sort of fruit inside. Older kids can even handle preparing their own plates, just nook in the microwave for a minute or so. Easy peasy!
Banana Chocolate Chip Pancake Bites
Ingredients:
1 cup flour
1 tbsp sugar
2 tsp baking powder
1/2 tsp salt
1 egg
1 banana, mashed
3/4 cup milk
1/4 cup oil
1/2 tsp vanilla
mini chocolate chips
Directions:
In a medium sized bowl, combine mashed banana, egg, milk, oil and vanilla. Add in sugar, baking powder and salt and whisk together. Gradually add in flour and whisk until batter is pretty smooth.
Into the wells of a greased mini muffin pan, drop batter in until 3/4 full. Sprinkle a few chocolate chips into each muffin well. Bake at 350 degrees for 10 minutes. Remove from oven and let cool for 5 minutes.
Using a butter knife, remove each pancake bite and set onto a wire rack to cool completely. When all cooled, line them onto a cookie sheet that has been lined with parchment paper. Put into the freezer for one hour. Then transfer to a freezer bag that has been dated and labeled.
Place into the freezer until ready to use. When ready to enjoy, remove desired pancakes from bag, either heat in the microwave for a minute or two OR place on a baking sheet and heat in the oven at 350 degrees for about 10 minutes. Serve warm with maple syrup if desired.
Makes about 3 dozen.
Subscribe to:
Posts (Atom)