Tuesday, December 31, 2013

Blueberry-Lemon Quick Bread


Now that the holidays are just about all behind us, I feel like we're starting to get back to a normal routine. As much as I've tried to simplify things lately, my days have been extremely busy. I feel like I've been in survival mode for much of the past two months, relying on very simple dishes at meal times and not having much time to experiment in the kitchen.

It felt good to do some baking last night after dinner. I've got a wonderful supply of frozen berries in my freezer that I preserved during the summer. We love having them on hand for smoothies and just for snacking but I've been anxious to do some baking as well.


This was an excellent way to use up some of those big, plump blueberries. It sort of reminds me of a blueberry muffin. I love the fresh lemon zest throughout the loaf and the bit of crunch the top layer offers. I feel anxious for spring while eating a slice, some of my most favorite flavors are captured right in this bread. Good thing I made up extras, I'll have plenty to share with my family tonight as we ring in the new year.

Blueberry-Lemon Bread

Ingredients:
1 stick butter, softened
1 cup sugar
2 eggs
zest of 1/2 lemon
6 oz. plain Greek yogurt
1/4 cup milk
1-1/2 tsp baking powder
1/2 tsp salt
2 cups flour
2 cups blueberries {do not thaw if using frozen}

Directions:
Preheat oven at 350 degrees.

In a large bowl, cream together butter and sugar until light and fluffy. Add in eggs and lemon zest. Mix in yogurt and milk until well combined. Sprinkle in baking powder, salt and flour. Mix just until combined. Fold in blueberries.

Divide batter between mini loaf pans. Sprinkle tops with additional sugar if desired. Bake for 45-50 minutes, bread will be lightly browned and toothpick inserted in middle should come out clean. Remove from oven and let cool in pans before taking out. Makes 3 mini loaves.
Monday, December 30, 2013

Favorite Books of 2013

It's no big secret how much I love to read. From the time I was a little girl, one of my very favorite activities has been curling up on the couch with a good book.

I made the hefty goal of trying to read 50 books this year, while I didn't come as close as I'd like to have; I'm still pretty pleased with my progress. I have a Pinterest board in which I use to track the books I've read throughout the year, feel free to take a peek at my list.

While I really enjoyed just about every book on that list, I chose six of my favorites to share with you. Perhaps you've already read them but maybe you'll be inspired by some new titles.


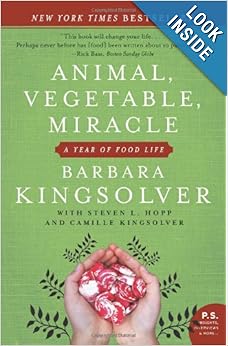
By far my top favorite read of the year was Animal, Vegetable, Miracle. I read this early on and it really changed some of my views on the food we eat.  Author Barbara Kingsolver and her family vowed for one year to only purchase food grown in their own area, grow their own or simply do without. It's hardly an easy task, but they made it work and did an awesome job if I might say so. Divided into seasons, the book is also filled with recipes giving you ideas for seasonal produce. I loved this so much, I just might read it again in the new year, this time breaking it down and reading with the corresponding season.


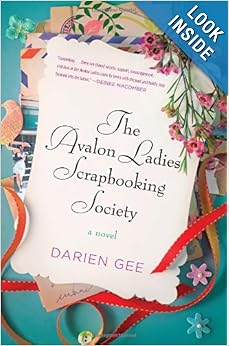
If you pay attention to my book lists, you'll notice I don't read much for fiction. But when I do, it's a really good book...well to me anyways. I really enjoyed Friendship Bread so I was really excited to read the sequel, The Avalon Ladies Scrapbooking Society. You'll love this story centered around friendship and helping others in a time of need.


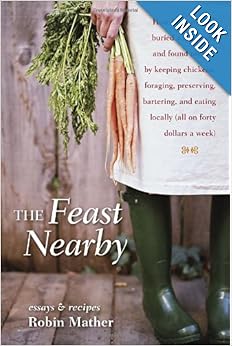
Another great read centered around eating locally and on a strict budget at that! When Robin Mather's husband of twelve years decides he wants a divorce and she's laid off from her job all within the same week; she's forced to make some pretty hard decisions and quickly. She decides to relocate to her cabin in Michigan where she'll allow herself only $40 each week for groceries, and trying to purchase only local ingredients. Robin takes us along her journey, telling us stories and sharing her recipes along the way. You've got to pick up a copy of The Feast Nearby, you won't be disappointed!


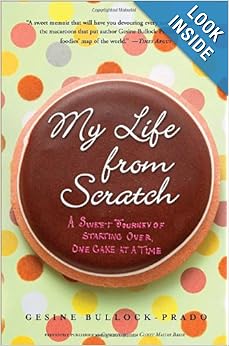
I have to say, I'm very thankful for my local library. Without them I don't think I would have the chance to read as many books as I do. I love that I can request for them to purchase a particular book I'm looking for if it's not already on their shelves. My Life From Scratch was another book this year they purchased and reserved for me to read right away. It's been one of my to-read list for a long time, and I quickly devoured it. I had no idea the author was Sandra Bullock's sister! She's a very talented baker and you'll love her story of how she gave up her big-time Hollywood job for one that she absolutely loves, operating her very own bakery.


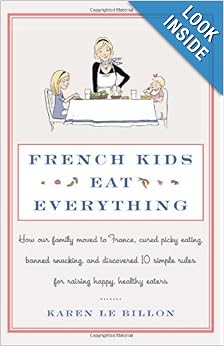
What parent doesn't struggle at one point or another with their child's eating habits? I'd be lying if I said my kids were perfect eaters. I don't think they're too picky for the most part and do enjoy a large variety of dishes, but we have our own battles from time to time. When our youngest actually eats most of her meal, it's a miracle! Seriously, I think the kid lives off of fruit (and bell peppers) some days. You can read my detailed review for French Kids Eat Everything here.


This last book was another fiction read and was also the most meaningful. I discovered Christmas Jars in November and was instantly touched by the meaning behind it. Reporter Hope Jensen discovers a jar filled with coins and bills right outside her apartment one night after it had been broken into. Where did it come from? Who brought it? She didn't know. Determined to find out more regarding these mystery Christmas jars that seemed to appear out of nowhere, she becomes close with the family who seemed to start it all.

Upon finishing this quick read, I immediately spoke with Josh and we agreed to start our own Christmas jar. By that time it was already close to Thanksgiving so I knew we would be cutting it close to fill this jar with change. We worked hard, making sure to use cash much more than we normally do so we could add as much change as possible.  Even the girls helped. We also had no idea whom we would bless this jar with, just prayed daily for God to present the perfect family. It was such a blessing to be able to deliver our jar right before Christmas, we felt God really did help us pick the right family and we're so excited to carry on this new tradition in 2014!

Sunday, December 29, 2013

Top 13 Posts of 2013

As we're nearing the end of the year, I honestly can't believe it's gone by so fast! I'm thankful for another year with my family and friends, for good health, and so much more. One of my favorite things is looking back at all of the recipes I've posted throughout the year and to see which ones are favorites among my readers.

This time I'm sharing which recipe or post was the most popular for each month. Plus, as hard as it was to choose just one. I've chosen a favorite of my own. So sit back and take a peek and I hope you'll let me know which one has been a favorite in your own house or maybe which ones you'll be choosing to make in the new year!


January- Twice Baked Mashed Potatoes


February- Candyland Birthday Cake


March- Number Three-Shaped Skittles Cake


April- Monday Randomness {BBQ pulled pork, Green Chile pork tacos and twice baked potatoes for the freezer}


May- Pesto Chicken Pasta


June- Garlic Smashed Crock Pot Potatoes


July- Freezer Meal Gift Basket


August- Freezer Cooking Guide


September- Slow Cooker Refried Beans


October- Crock Pot Chicken Fried Rice


November- Caramel Apple Cheesecake Bars


December- Buffalo Chicken Cheese Ball


Steph's Choice- Blueberry Breakfast Cake

Thursday, December 26, 2013

Bacon-Wrapped Crackers


Appetizers are a must around the holidays, if you're like our families, we make our meals based around a bunch of different finger foods. My husband's family has always done this. We'll make up small sandwiches, tons of dips and whatever else sounds good and that's our Christmas Eve dinner. My own side of the family adapted this tradition recently after we grew tired of the same ham/turkey dinner each year.

These crackers were something new I tried for Christmas dinner last night and I have to say they were a huge hit! In fact, they went quickly and I probably should have made a double batch.


We all know anything wrapped in bacon is just that much better. I had a friend tell me about these specific crackers and I found the recipe intriguing. We especially loved the sweet brown sugar ones, they reminded me much of those bacon wrapped smokies we make each year. The savory Parmesan cheese ones were also delicious as well.  I think we've found a new favorite appetizer for the holidays, we surely will be making these often!


Bacon-Wrapped Crackers

Ingredients:
1 lb. bacon, cut in half
1 sleeve Club crackers
Parmesan cheese
Brown sugar

Directions:
Preheat oven to 250 degrees. Line a large cookie sheet with foil and place a baking rack on top of cookie sheet.  Place crackers along the baking rack, it will be a tight squeeze but you can fit all 30+ crackers on there.

Take about 1 teaspoon of Parmesan cheese and place on half of the crackers. Then taking a teaspoon of brown sugar, place on the other half of crackers. Wrap each cracker with one half slice of bacon, making sure to tuck the ends underneath. Place back onto prepared sheet.

Bake at 250 for two hours. Remove from oven and transfer to a serving platter. Serve warm if possible, but these are also great at room temp. Makes about 34 crackers.

Thursday, December 19, 2013

Biscoff S'mores Cookies


I've got one more really good cookie to share with you before the holidays, just in case you're searching for something new to make this weekend. These come from my friend, Becca, whom attends my cookie exchange each year. We had tons of great choices this year, but this particular one was a favorite!

I have this new obsession with Biscoff cookie spread, I promise we don't go through a jar a week or anything crazy like that. But it's good stuff! Naturally I was drawn to her cookie choice.


The kids loved the marshmallows on top and I think my favorite is the extra cookie spread drizzled on top. The cookies itself are very soft, I liked the chocolate chips sprinkled throughout, it's just enough without being too chocolate-y. I know, for some of you, there can never be enough chocolate, right?

My girls have already requested these a few times, looks like they will be the first cookies I bake next time we're in the mood for some cookies!

Biscoff S'mores Cookies

Ingredients:
1/2 cup sugar
1/2 cup packed brown sugar
1 stick butter, softened
1 cup Biscoff cookie spread + extra for drizzling
2 eggs
1-3/4 cup flour
3/4 tsp baking soda
1/2 tsp baking powder
dash of salt
1/2 cup chocolate chips
mini marshmallows

Directions:
Preheat oven to 375 degrees.

In the stand of a mixer or large bowl, cream together both sugars, cookie spread, and butter until light and fluffy. Add in eggs and mix until well incorporated.

In another bowl, combine dry ingredients and gradually add into creamed mixture. Fold in chocolate chips.

Using a cookie scoop, drop rounded dough onto cookie sheets lined with silicone baking mats or parchment paper. Using palm of your hand, press down on the dough just a bit to flatten. Bake for 7 minutes, remove from oven and immediately place 4-5 mini marshmallows on each cookie. Place cookie sheet back in oven and bake for another 2 minutes, just until marshmallows have puffed. Remove from oven, let cool on cookie sheet for a few minutes before removing to a wire rack to cool completely.

When cookies are cooled, heat a small amount of cookie spread in a bowl. Place in warm spread in a baggie, snip the corner just a bit and drizzle onto cookies.

Tuesday, December 17, 2013

White Chocolate Eggnog Fudge


Does that ever sound decadent or what?! I'm not a big eggnog drinker but I do enjoy a glass or so around the holidays. It just seems so festive. We purchase all of our milk from a local dairy farm, they actually have a small outlet up the road. I can find anything from ice cream, eggs, cheese and even local meats. I was really excited when they started carrying eggnog, it's made locally and you know I love that!

Plus I really think the flavor is so much better than what I would normally buy in the store. I really noticed a difference when I made my pumpkin pie at Thanksgiving time.

So of course it's going to cost me a little more, about $2, not a huge amount but I sure don't want to be wasting my money. Since we don't drink a whole lot of eggnog I have been busy trying to incorporate it into my recipes. First we tried it in french toast. Yum! This was seriously sooo good! I loved listening to kids eat that morning, smacking their lips and making noises at they enjoyed their slices.


I simply replaced the milk with eggnog in a traditional french toast recipe. Then served with a light drizzle of pure maple syrup. If you're still not sure on what to serve Christmas morning, consider this!

Back to the fudge. I haven't had time to do much baking for myself this season, I've been busy working on orders for others. Which I do love, don't get me wrong, but I like to make baked goods for my own friends and family too! I figured I could try adding some of this eggnog into fudge, at least it was worth a try.


I'm really happy with how it turned out. Fudge is already decadent so you don't need much to satisfy that craving. The eggnog is very subtle, but you can tell it's there. It's also very creamy, sort of melts in your mouth. It'll be the perfect addition to my Christmas tins...that is if I ever get the time to finish them.


White Chocolate Eggnog Fudge

Ingredients:
3/4 cup eggnog
1 stick unsalted butter
pinch of salt
2 cups sugar
10 oz. white chocolate chips
1 tsp nutmeg
7 oz. jar marshmallow creme
1 tsp vanilla

Directions:
Line an 8x8 inch baking pan with foil, lightly spray or butter. Set aside.

In a medium saucepan, combine eggnog, butter, salt and sugar. Stir together and let come to rapid boil. Stirring constantly, let cook for 8 minutes or until temperature reaches 234 degrees on a candy thermometer. Remove from heat and immediately stir in white chocolate chips and nutmeg. Stir until smooth, I did put my mixture back on the stove for just a minute or so to melt the chocolate completely.

Add in marshmallow creme and vanilla, stirring until completely smooth. Pour mixture into prepared pan. Sprinkle lightly with additional nutmeg if desired. Let chill in the fridge until cooled completely. Cut into small squares.

Wednesday, December 11, 2013

Buffalo Chicken Cheese Ball


I have to take a moment to brag about my kids. I've been in contact with our local food bank for a month now, trying to set up a time for the girls and I to go volunteer. I wasn't sure if our youngest, who's three would be allowed to join or how she even would handle participating in something like this. Especially for two whole hours, that's a long time for kids at any age to engage in a physical activity.

I am so proud of them! Not only did they willingly help complete each task we were assigned, but they did it with good attitudes. We had many other helpers joining us last night, even some kids. Our first task was to fill plastic sacks with items for the backpack program. Each Friday afternoon many children at our area elementary schools are sent home with a backpack full of food for the weekend. It's heart breaking to think that some of these children may not have access to any other food besides what's included in that backpack for the entire weekend. What's even sadder is, there's really not that much included, but it's a start.

We then went into another area of the warehouse building to help stock the shelves with non perishables. It was like a game to them. We had grocery carts fulls of boxes of cereal, canned fruit and vegetables, soups, peanut butter, you name it. They grabbed a couple items at a time and had to figure out which shelves they belonged on.

By that point things were starting to slow down. They had so many great volunteers last night. My girls were definitely tired and we needed to get going home so they could get ready for bed. I'm so impressed they lasted that long because I honestly did not know what to expect. I think we're all in agreement we'd like to go back and help out again, especially our oldest. She'd like to bring a good friend along with. My heart is filled with joy right now, I love seeing them wanting to partake in activities such as volunteering. It's such a great experience for them and a good lesson in giving back to others. Because you never really know, some day we might be the ones needing help.


Okay, so back on track here. This was one of the appetizers I created for my cookie exchange last Saturday. I've always been a huge fan of buffalo chicken wing dip, it's always on our menu when we make appetizers. I love that it's warm, creamy and spicy!

I had seen a version that was served cold, a cheese ball to be exact. What a great idea. I don't have to worry about keeping it warm in a crock pot and it's something different.  I also think for whatever reason, a cheese ball just looks fancier. More elegant if you will. The taste is still the same, you've got that great cheesy buffalo flavor going on. It's still creamy. I served mine with celery, crackers and tortilla chips. All were great for dipping and spreading.

So tell me, are you adding this to your holiday menu?


Buffalo Chicken Cheese Ball

Ingredients:
2- 8 oz. pkgs cream cheese, softened
1 oz. pkg. ranch seasoning
3/4-1 cup buffalo sauce  (I really love the Cookie's brand)
8 oz. monterey jack and cheddar cheese block, grated
1 cooked, boneless, skinless chicken breast, shredded

Celery, crackers, tortilla chips or baguette slices to serve with

Directions:
In a bowl combine cream cheese and ranch seasoning. Add in buffalo sauce and mix well until creamy. Mix in shredded chicken and cheese.

Place mixture onto a large piece of saran wrap. Gather all sides and shape the cheese ball. Refrigerate for at least a few hours. When ready to serve, remove from fridge, reshape cheese ball if needed. Remove plastic wrap, place onto serving platter. Serve with crackers,etc.

Adapted from: Buns in my Oven

Monday, December 9, 2013

Annual Cookie Exchange


First, I want to apologize for my lack of posting. As organized as I try to be, I seem to be running out of time lately. I hope to get back on track and posting every other day again, I know this week I do have an order for 30 dozen cookies but after that things seem to be slowing down just a bit!

Saturday afternoon I hosted my annual cookie exchange, this is one event I love to plan each year at Christmas time. Time got away from me and my planning was a little behind than normal but I think we still pulled off a fabulous party. This year I had nine other gals join me, most of whom attend each year; my dad's office was so gracious to let us use their newly remodeled break room for our party. It had everything we needed and more, plus tons of room. Something which my little house is lacking.


We had a nice variety of appetizers to munch on this year. My mom and another friend were so kind to help me in preparing the food. These were a couple new dishes I made, the first being a buffalo chicken cheese ball dip and the second, a veggie wreath. Sort of just like a veggie pizza but made in the shape of a wreath.


I had some fun games along with prizes planned. We got to chatting and I forgot to take pictures of the first few games, but these are during our present game. I wrapped up a prize in a box, like really wrapped it! As in duct taped, bagged, and double wrapped. Guests had to wear a scarf and thick, bulky gloves when trying to unwrap the present. They had to roll dice and whoever got a 6 first started the game, the dice continued making it's rounds, whenever another guest rolled a 6 they got to take the package away from the previous person. We had lots of giggles during the ones especially!


Lastly, came our favorite part: swapping the cookies! We had some awesome and certainly unique recipes this year. I decided on these snickery doodles, they were so good. Literally a snickerdoodle with Snickers candy bars added into the dough.


Here's a peek inside my own container I brought home. We might need to stick these in the freezer soon otherwise they're all going to be gone!


Finally, my favorite part of all! Each year I ask the ladies to bring along any extras they have from baking and we divide them into two boxes. I choose two different places to donate the cookies and deliver them. This year our local police department and a transitional housing program for homeless, single women with children will be the lucky recipients. I sure hope they enjoy!

Monday, December 2, 2013

Mini Lemon Cakes


It sure was nice to have a long weekend, take a break from blogging, I didn't have any cake orders for the weekend and got a lot done around the house. We spent much of our Saturday putting up Christmas lights outside and decorating inside the house.

Saturday I also took some time to make up a salad and these lemon cakes for a family at our church. They had lost their mom to cancer earlier in the week and were having  the service on Saturday afternoon. It was great to see our church all come together to rally around the family during this difficult time.


I haven't made these in years but thought they would be perfect for individuals to grab and snack on. They'd be perfect for any holiday party coming up and they make so many.  I love just about anything lemon, the cakes itself are moist and bursting with fresh lemon flavor. The lemon glaze on top is just enough without making them too heavy or sweet.

Mini Lemon Cakes

Ingredients:
12 tbsp butter, softened
4 oz. cream cheese, softened
1 cup sugar
3 eggs
2 tbsp lemon juice
1 tsp lemon extract
1/2 tsp vanilla extract
Grated lemon peel from 1 lemon
1-1/2 cups flour

Glaze:
1 cup powdered sugar
1/2 tsp lemon extract
splash of milk for thinning

Directions:
In a large bowl cream together butter, cream cheese and sugar. Beat in eggs, one at a time. Add in lemon juice, extracts and lemon peel. Gradually mix in flour.

Taking a small cookie scoop, divide batter among wells of a mini muffin pan. Bake at 325 degrees for 10-12 minutes. Remove from oven and let cool completely. Repeat with remaining batter.

To make glaze, combine all ingredients in a bowl and whisk together. Place a sheet of parchment paper underneath a wire rack. Once cakes are completely cool, dip tops in glaze. Place cakes on wire rack and let dry completely before serving.

Makes about 4 dozen.


Wednesday, November 27, 2013

Pumpcan Pie


Do you have everything ready to go and planned out for tomorrow? I'm in charge of dessert for our dinner, unfortunately the hubby has to work tomorrow night but the girls and I will be joining my family at my brother's house. I've been trying to decide what kind of pie to make and you know me, I always like to come up with new creations.


Pumpkin and pecan seem to be pretty traditional pies gracing the Thanksgiving day tables. I wasn't sure if this would work but I decided to combine the two into one pie. I baked it while the kiddos napped today and had the hubby give it a try, he said it was better than my regular pumpkin pie.  Yay!

I have say this is genius, it really is. The fillings meld together while baking and you really do get the texture of pumpkin and pecan pie all in one. All with a crunchy pecan layer on top. It's absolutely delicious! Again I used eggnog in my pumpkin filling, just because I really love the extra creaminess and flavor from it. If you don't have that on hand or rather skip it, try heavy cream or evaporated milk.


I know it's getting late in the game, but if you're seriously still searching for a dessert; give this pie a try! It's sure to become a new favorite.

Pumpcan Pie

Ingredients:
1 unbaked pie crust

Pumpkin filling:
1 cup pumpkin puree
2/3 cup eggnog
1/2 cup packed brown sugar
1 egg
1 egg yolk
1 tsp vanilla
1 tsp cinnamon
1/2 tsp nutmeg
pinch of salt

Pecan filling:
1/2 cup corn syrup
1/4 cup packed brown sugar
2 tbsp butter, melted and cooled
1 egg
1 egg yolk
1 tsp vanilla
1/2 tsp cinnamon
pinch of salt
1-1/2 cups pecan halves

Directions:
Roll pie crust out onto floured surface, place into 9-inch pie plate.  Trim edges and crimp pie crust. Set pie plate aside. Preheat oven to 375 degrees.

To make pumpkin filling: In a large bowl combine all ingredients and mix together well. Set aside.

To make pecan filling: In a large bowl combine all ingredients except pecans, whisk until mixture is smooth. Set aside.

Pour pumpkin filling into prepared pie crust. Sprinkle pecan halves over pumpkin filling, in a single layer. Then pour pecan filling over the pecans. If you have any pecans floating to the top, press them back down using your fingers,

Bake at 375 degrees for 10 minutes. Then decrease temperature to 300 degrees and bake for another 40 minutes. Filling will be set and slightly puffed, a knife inserted in middle should come out clean.  Let cool until room temperature before serving.

Inspired by: Baking: From My Home to Yours


In other fun news, we picked up our first beef purchase today! This is something I've wanted to do for a long, long time and just finally did some research on local farms in our area and was able to locate one. The particular farm we chose is fairly close to home, about 35 miles or so. The family operates a certified organic farm, which means the beef we purchased is treated humanly, not given antibiotics or hormones. They're pasture raised and grass fed. All important qualities I'm looking for in my meat. To be honest, last night was the first night I had probably ever tasted grass fed beef and it was crazy how good the hamburger tasted, plain even. It had so much more flavor than what I typically buy from our grocery store and I hadn't even added seasonings at that point.

So anyways, I'm really excited to have our freezer stocked with meat for awhile. We'll be purchasing pork later in the winter when it's available and I've already got a good amount of poultry from our CSA farmer. It feels good to be able to provide my family with nourishing meat and support local farmers at the same time.

Monday, November 25, 2013

Monday Randomness


What an incredibly busy weekend we had, I only wish I could have one more day just to focus on all the cleaning I didn't get done. Do you ever feel like that?

Much of our weekend was spent visiting with family from out of town. Yesterday the girls and I spent a few hours at my parents, my cousin's family came into town and we had a great time visiting with them. The kids all played together so well, love it when that happens!


My mom made her amazing homemade chicken and noodles for lunch. This is definitely her specialty and everyone always loves it. I was lucky enough to get leftovers sent home and enjoyed a bowl for lunch today.

We also had an early Thanksgiving with my husband's side of the family yesterday. His grandparents came up from Missouri for the weekend. I spent much of my Saturday afternoon in the kitchen preparing dessert for our dinner.


I've been wanting to try Ally's apple pie bars ever since I seen her post her family's recipe. They remind me of my own grandma's apple bars, unfortunately I don't have her exact recipe so I was happy to give Ally's a try. I took them to Thanksgiving dinner, along with my favorite pumpkin pie. We all loved these bars, in fact my mom has asked me to make a pan for our Thanksgiving this week!

Well I hope you all had a wonderful weekend as well. Here's to a nice, short work week! I'm looking forward to at least one day of sleeping past 6:00 a.m!


Related Posts Plugin for WordPress, Blogger...