Sunday, June 30, 2013

June Reads


Now that my schedule is starting to slow down a bit I'm finding more time to squeeze in some reading each day. Even if it's only for 10 minutes I feel better and enjoy some "me" time doing what I love most. I managed to finish two books completely for this month, both of them were centered around the food industry, I apologize if these don't interest you at all. I can't help it, I'm fascinated with anything to do with food. These two books have been on my list and I'm glad I took the time to read them.


Pandora's Lunchbox is pretty new to bookshelves, I can't remember where I first heard about this book but I immediately put it on my to-read list. I will admit even for someone that loves reading about our food industry this was a little advanced, there were moments when I thought I would become uninterested. It's very technical at time but overall I'm glad I finished it and took a lot away.

Author Melanie Warner explores just exactly how processed food is made, anything from our breakfast cereals, yogurt, sliced American cheese to those chicken nuggets so many parents rely on for quick meals. It's only common sense to know that all of these foods contain many preservatives but to know how these chemicals are formed is another. 

A few interesting facts I took away from the book include:
* One of my favorite Subway sandwiches, the Sweet Onion Chicken Teriyaki contains 105 ingredients in just the bread, chicken and sauce alone. This really grossed me out! Of those 105, 55 are dry, dusty substances that were added to the sandwich for a variety of reasons. I think I will have a hard time eating another one of those.

* The amount we pay for food has dramatically declined over the years. From 20.6% in 1950 to now only 9.8% of our income. That's lower than any other country. Now I realize that we are on budgets especially when it comes to groceries but really what this is telling us; is we rely on way too much cheap, processed foods to feed our families. We can shell out money for TVs, brand new cars and the latest electronics but then resort to fast food and packaged junk to feed our children. Something is wrong with this picture.

* In our system we have about 5,000 food additives that are allowed, over half of them being food flavorings. Wow, I had no idea that so many of these existed.

I know where I stand when it comes to packaged processed foods, I really try hard to limit the amount of these items in our home. There are times though that I bake a dessert with the help of a brownie mix, the kids love cereal some mornings and of course my hubby loves his grilled American cheese sandwich. I think moderation is key. It's almost impossible to avoid any sort of food additive in our society. I think that if more Americans took even just 20-30 minutes out of their busy day to prepare at least one good, wholesome meal for their family it would make a huge difference. We have got to stop relying on junk and fast food to nourish our children. 

Okay, stepping off my soapbox now. I'm not sure that everyone would appreciate Warner's message, but I do think it will open your eyes to what we're really eating each and every day.


I've never particularly been a fan of school lunches growing up, I always thought the food was disgusting. We didn't have an on-site kitchen and our food was transferred over from another school, so you can imagine by the time it got to us it was pretty soggy. My own girls take their lunches almost every day, there are a few instances where they've ask to eat lunch at school but for the most part they don't enjoy what's being served.

I don't think it has anything to do with being picky, as they are pretty good at trying most anything. I don't think the quality of the food being served in our district is all that great. I do think it's improved somewhat and I commend them for taking actions to incorporate more fresh produce into our children's meals.

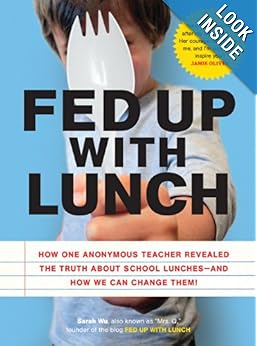
With that being said, I admire the challenge author Sarah Wu took on for one whole year.  In her book Fed Up With Lunch, elementary school teacher Sarah Wu forgets her lunch one day and is forced to eat a public school lunch. She's shocked at what students were being served each day and that's when she decided to start her year-long project and blog each day about what she was eating.

Along the way she was able to understand why students were dozing off in the afternoons and not able to focus as well. Could it have anything to do with the fact that lunches are so rushed, giving students only about 15 minutes to scarf down their food? She noticed many times students only had time to consume their chocolate milk and possibly a sugar filled fruit jello cup. 

As a parent of young children I really enjoyed this story and was made more aware of what things need to be changed in our school systems. I love the fact that in our district many schools are now growing their own gardens, teaching students about gardening and where our foods come from. I hope they will continue to incorporate fresh produce into our children's meals each day. I loved Wu's suggestions for getting more involved and how we help to bring about change. It's obviously not an easy task but I think if parents can all work together and voice their opinions maybe we can start to make some huge changes in our food system. 

Saturday, June 29, 2013

Kohlrabi-Apple Slaw


I've been enjoying trying new things from our weekly produce box. I made this slaw last night to use up our kohlrabi from the previous week. Have you ever tried kohlrabi? I hadn't either until last night. It's sort of like a cabbage but many people eat it peeled, raw and with salt like a radish. When I looked it up, many definitions say it's taste and texture is very similar to the stem of broccoli, but much milder and sweeter. I have to agree, it's taste was very mild and mine was really juicy like an apple. Our youngest kept reaching for bites as I was cutting it up, we both enjoyed it raw with no seasonings.


When peeled it looks like this, the flesh is mostly white or a very light green. I peeled mine with a small paring knife, I think a vegetable peeler would work also. I then just cut mine into small matchsticks for the slaw. It's very easy to cut through, so you can slice it for salads or to eat raw.


After doing a little research I decided to go with an easy slaw. I found some with carrots and a creamy mayonnaise based dressing. But really a simple, light salad like this sounded wonderful! With just a few simple ingredients I was able to create a delicious and refreshing slaw that I would love to eat all summer long. I know new foods can be intimidating to try, especially when it comes to veggies. Visit your local farmers' market and find yourself a kohlrabi, I think you'd really love this slaw. It's so simple and perfect for summer!

Kohlrabi-Apple Slaw

Ingredients:
1 kohlrabi
1 apple, I used Gala
1-2 tbsp. olive oil
Juice of half of lemon
Salt and pepper to taste

Directions:
Peel kohlrabi using a paring knife or vegetable peeler, the inside flesh should be a light green or white color. Cut kohlrabi into small matchstick pieces and set into a medium bowl. Cut apple the same way, I left the skin on mine for extra color and nutrition. Add apple to bowl. Drizzle olive oil and lemon juice in bowl. Toss together. Season with a little salt and pepper. Taste and adjust seasonings if necessary. Serve immediately or store in fridge.

_______________________________________________________________

I hope you're enjoying these new healthy recipes. I'm having fun creating new dishes for our family to try. For the most part everyone is liking our produce box.

Well we're off to enjoy our day. Our oldest is in a parade this morning so we're getting around for that. We've got some family in town over the weekend, I think we'll be taking the kids goofy golfing later tonight. That should be fun! Enjoy your weekend!

Friday, June 28, 2013

Garlic Smashed Crock Pot Potatoes


I love having a nice meal ready for me at the end of the day, one that's been slowly cooking in the crock pot. In the summer it's great to not turn on the stove as often. Until the other day though, I don't think I've ever used my crock pot for a side dish. Lots of dips and appetizers, even a dessert but never potatoes.

I even felt we had a nice sit-down meal and were out the door by 6 p.m. for a night of softball games. I started these during nap time and by the time I started prepping dinner, they were all ready. I'm not sure how well they would work set at on the low setting for several hours, but it might be worth a try. I understand not everyone is able to work from home like I am and has the luxury to start meal prepping throughout the day.


These went great with our grilled pork chops as they would with any sort of meat. I even thought about adding some crumbled up bacon and cheddar cheese....maybe next time though!


Garlic Smashed Crock Pot Potatoes

Ingredients:
2-1/2 lbs. small red potatoes
3 garlic cloves, minced
Salt and pepper to taste
1/2 tsp onion powder
1 tsp. Lawry's seasoning
2 tbsp. olive oil
2/3 cup water
4 oz. cream cheese
3 tbsp. butter
1/2 cup heavy whipping cream or milk, plus another splash or two

Directions:
Dice potatoes and add to the crock pot. Add in garlic, seasonings, olive oil and water. Mix well to combine. Cover and cook on high for 3 hours or until potatoes are tender. Remove lid and using potato masher, mash until desired consistency. Stir in cream cheese, butter and milk or whipping cream. Serve immediately or switch to warm setting until ready to serve.

Adapted from: The Crockin' Girls Slow Cookin' Companion

___________________________________________________________________

Any big plans for today? I'm going to enjoy my day off with the family! No orders to fill for the weekend either. I think the girls and I will make our way to the pool later this afternoon to soak up some of this beautiful sun. Have a great Friday!

Wednesday, June 26, 2013

Strawberry Freezer Jam


Last Saturday while the girls were away with my parents I went out to the strawberry farm and picked another 13 lbs. I couldn't sleep that morning so I got up early, finished freezing the remaining strawberries from our first trip and then went to pick more.

It didn't take long before my box was full. It's so peaceful out there in the fields, especially being by yourself. Even though my box was getting full, I kept finding myself reaching for just one more strawberry. It's addicting!


I love making strawberry jam each summer. I found this particular recipe two years ago and immediately loved it! Jam can be intimidating to make but this freezer recipe is so easy, you honestly can not mess it up.

Well I had a hard time finding pectin in the store, I actually had to go to three different ones. I guess everyone had the same idea. I ended up going with the Ball brand instead of Sure-Jell like I've used before. I noticed the recipe on the back of the container was a little bit different than what I normally use. So I decided to test out one batch and see if we liked it.


One thing I particularly loved about this version was the fact in contains far less sugar. It's certainly still sweet enough and thick like jam should be. If you've never made homemade jam before you need to try this. You'll never want to buy store bought jam again!

Strawberry Freezer Jam

Ingredients:
3-1/3 cup strawberries, hulled and crushed
1-1/3 cup sugar
4 tbsp pectin (I used the Ball brand, real fruit instant pectin)

Directions:
In a large bowl crush strawberries using a potato masher. In another large bowl combine sugar and pectin. Add in crushed fruit and stir all together. Let mixture sit for 3 minutes and then transfer to jars. Let set for 24 hours and then either store in fridge or freezer. Will keep for about 4 weeks in fridge or 1 year in freezer. Makes 4 half pint jars.


Monday, June 24, 2013

Kale Chips


I told you on Friday about our produce box, each week through October we'll go pick up a bunch of fresh produce grown by a local farmer. We won't always know what we'll be getting, I'm sure there will be quite a few things included that we've never tried before. I'll have to get creative in the kitchen because honestly, I know we don't eat as many veggies as we should. Fruit, now that's another story.

Saturday I had some extra free time in the kitchen so I played around with the kale. Kale is something new to me. I like adding it to our green smoothies and it's really good mixed with my scrambled eggs and bell peppers. But other than that, I haven't ate much of it.

Everyone seems to be talking about kale chips though. I did some good ol' googling and read a few different blogs and figured I would wing it. I think I really like these! If we get more kale in our produce box, I wouldn't mind messing around with the spices a bit more. But overall these are such an easy and healthy snack.

They're super crunchy, just like potato chips. I added a little bit of garlic powder and salt to my batch so they had plenty of flavor. Now if you're not a fan of any sort of greens, it might take a few tries but I really think the flavor is subtle. Since the girls were gone I didn't get to have them taste any, I think they would even eat a few.

Kale Chips

Ingredients:
1 bunch of kale
1 tbsp olive oil
1/2-3/4 tsp garlic powder
sprinkling of salt

Directions:
Preheat oven to 325 degrees. Thoroughly wash and dry kale, using hands tear into smaller pieces, discard center stem. In a medium bowl combine kale with olive oil and seasonings, use hands to mix together well. Toss kale onto baking sheet and bake in oven for about 12 minutes. Watch closely as to not burn, but you want kale to be crispy like chips. Remove from oven.

____________________________________________________________


Check out this adorable cake I made over the weekend! Our friend's daughter is turning one and she absolutely loves owls. It was a lot of fun to make and I hope she had a wonderful celebration. Have a great Monday!

Friday, June 21, 2013

Mexican Manicotti


It's Friday and I am officially kid-free for the entire weekend! Of course the first thing I did was get this house cleaned up, it feels good knowing that it should stay fairly clean for more than an hour.


Yesterday we picked up our first CSA produce box. I have been anxiously waiting for this to start, it's been such a wet spring here in Iowa that our farmers have been spending lots of time trying to play catch up. Fields are still pretty wet and they are just now starting to get many crops planted and even re-planting those that have been lost due to all the rain. Nevertheless our first week is not as exciting as others will be but I'm still looking forward to using all of our goodies. I'll be honest, there are a few things we have never tried before but that's what's makes it fun!


I made this for lunch a couple days ago, our evenings have been so busy with softball and other activities that I don't always have much time to create new recipes. I don't think the kiddos minded, in fact everyone ate really well. It's sort of a taco/burrito meets pasta dish. One that most anyone would enjoy! Leftovers are delicious as well. I am not a fan of leftovers so that should say a lot right there.

Mexican Manicotti

Ingredients:
1 lb. ground beef
1 package manicotti shells
16 oz. can refried beans (or homemade)
3 tsp chili powder
1 tsp oregano
1 tsp garlic powder
Salt and pepper to taste
2 cups salsa
1/3-1/2 cup water
1 cup Monterrey jack cheese

Directions:
Preheat oven to 350 degrees. Cook shells according to package directions. Meanwhile, brown ground beef in a large skillet. Rinse and drain. Add refried beans and seasonings to ground beef and mix together well.

Lightly grease a large casserole dish. Fill each cooked shell with meat/bean mixture. Place filled shells in casserole dish. Top with salsa and sprinkle with cheese. Add just a little bit of water along sides of pan, to eliminate the pasta drying out. Cover with foil and bake at 350 degrees for about 15-20 minutes until cheese is melted and shells are heated through.

______________________________________________________________

Well the hubby and I are off to the movies soon. We've got a few things planned out for the weekend but it's going to be great just to relax a bit and enjoy some peace and quiet. I'll be ready for the girls to be home come Sunday though! Enjoy your weekend.

Wednesday, June 19, 2013

DIY Fruit Leather


I realize I've been posting about strawberries a lot, please forgive me. I just can't get enough of the little things. I promise I'll throw something savory in here soon, Friday, stay tuned for a fun Mexican manicotti dish that all family members will enjoy.

Back to the fruit leather though. These have been on my DIY list for awhile now and something I thought the kids would enjoy. I'm sure everyone has had a fruit roll-up at least one point in their lifetime. I honestly refuse  to buy them for the kids mainly because they are filled with way too much sugar but also because of all the unnecessary preservatives added in.


These on the other hand, I wouldn't care if they devoured the whole pan in one sitting! I added a little bit of agave nectar for sweetener, you could use granulated sugar if you wanted. Whether you choose honey, agave or sugar; start with a small amount and increase as needed. The girls thought they were a little on the sour side, I didn't think so. Next time we'll add just a bit more, I've made that change in the recipe below.

I was really surprised at how easy the fruit leather was to make, but it does take a long time in the oven. It's not a quick process or probably something that you'll make very often. But it's fun and that's what's important! Feel free to experiment with different combinations of fruit, I stuck with plain strawberry, although I was tempted to throw some peaches in there as well...yum!

DIY Fruit Leather

Ingredients:
3 cups strawberries, washed and hulled
2 tbsp agave nectar
splash of fresh lemon or lime juice

Directions:
Line a cookie sheet with parchment paper and set aside. Preheat oven to 170 degrees or lowest setting. In a food processor or blender, puree strawberries. Add in agave and lemon/lime juice, pulse just to combine.

Pour strawberry mixture oven lined baking sheet and smooth into an even, thin layer with a spatula. Place in oven for at least 6 hours or until fruit leather is set. Remove from oven and let cool completely. Then remove the parchment paper from pan, cut with kitchen shears into strips. Roll the strips up and enjoy!
Related Posts Plugin for WordPress, Blogger...