Friday, May 30, 2014

Closing one door....and being patient


I'm going to set aside the recipes today and get a little personal, I hope you'll stick around.  It's been sort of a hard week for me, after close to eight years of providing child care in my home, I am closing my doors and moving on.

Our youngest turned four in March and will be ready to start preschool in the coming fall. This has always been our plan, but it doesn't make it any easier. It's still hard, it's hurts to say good-bye to what I've known as my career for so long. At the same time I feel excited and ready to enjoy a whole summer with my three girls. Lots of time at the pool, no schedules to tend to, just us and whatever we feel like doing that particular day.


The kids worked on these keepsake pillowcases early this week. I knew I wanted something special for them to take with them as they left, my girls are already sleeping with theirs. As I've told each of the families, I know it's not like we'll never see each other again. We've developed some wonderful friendships over the years. We're already in the midst of planning play dates, and I know the kids will be anxious to see their friends very soon.

My husband has been wonderful, offering me words of encouragement, in fact he even surprised me with flowers and a bottle of wine last night after work. In his card he wrote these words:

I will instruct you and teach you in the way you should go;
I will counsel you with my eye upon you.
Psalm 32:8

If you know Josh at all, he's not normally one to quote scripture. This was very comforting to me last night.


So what's next for me? I'm not exactly sure! I've always had an idea, I still would love to work with children, particularly with our school system as a para educator. We'll see. I'm going to try to be patient and see what happens. Maybe what's my plan is not God's plan for me.

In the mean time, I'm going to enjoy my summer with the girls. Is it bad I already feel like our calendar is filling up quickly with activities for them to do? I'm looking forward to our garage sale in a few weeks, clearing out all of the toys and items we'll no longer need. {Less cleaning for me, yay!} Having more time for my blog is another thing I'm looking forward to. I'm hoping to grow this little thing, who knows, maybe something great can come of this? 

Wednesday, May 28, 2014

Club Lettuce Wraps


One meal we love during the summer is wraps. They're so versatile, you can stuff pretty much any sort of topping into a tortilla shell and call it good. I love making them when it's hot and I don't want to warm up the house anymore, they're great to take along to the ball games and it's a generally lighter meal when the last thing you want to do is eat.

I picked up a few different varieties of lettuce at our farmers' market this past weekend, with these exactly in mind. We've got a few busy weeks coming up as the girls are preparing for their big end of the year dance performance. While we're running back and forth between practices I figured some easy meals like these wraps would do us some good.


Plus now that it's shorts and tanks weather, I figured it won't hurt me to start eating a little lighter. Those extra pounds sure do creep up during the winter!


Club Lettuce Wraps

Ingredients:
1/2 lb. ham
1/2 lb. smoked turkey
1 lb. bacon, cooked
Large lettuce leaves
sliced tomato
sliced avocado
pickles

Directions:
Clean lettuce and pat dry with a paper towel.  Place one to two pieces of lettuce onto a plate; add a slice of ham, two slices of turkey and one piece of bacon (broken in half) to the center of the lettuce. Place your desired toppings over meat. Add ranch dressing, mustard or mayo on top if desired. Gently pull the lettuce around the toppings and cut in half. Secure with a toothpick if needed. Repeat with remaining ingredients, makes 6-8 wraps.

Monday, May 26, 2014

Strawberry Crumble Pie


I know pie is a dessert welcomed year round, but I love baking pies in the summer time. Fresh fruit is in abundance and let's face it, berries can make for some of the greatest pies ever. Strawberry crumble in particular is one that I've been thinking about for quite some time now. I remember Beth from The World Needs More Pie sharing this recipe last summer on her Facebook page. It's one of her best selling pies at her Pitchfork Pie Stand in Eldon, Iowa.

I love following Beth's story of living in the American Gothic House and of her successful pie stand. I recently purchased her new cookbook and have loved reading through its entirety. She shares so many wonderful looking recipes for pie, but this one in particular stuck out at me.

We had some friends over Saturday evening to grill and enjoy a fire around the fire pit. This pie seemed like the perfect ending to our meal, in fact, it was. Paired with a scoop of vanilla ice cream, it was simply divine.


While strawberries aren't quite in season in Iowa, I've been having some good luck with ones in the grocery store. The sweet strawberries are the star of this dessert, not requiring much for additional sugar. Taking the extra time to make your own pie crust is essential, too. It's really very easy and the taste is so much better than anything store bought.


Rhubarb is in season right now, take advantage and add some into this pie. Or how about another type of berry? Blueberries would be a great addition! I'm looking forward to finding some mini pie tins and making up some mini pies for our friends and neighbors. Something about rolling out the pie dough, crimping the edges of the crust and filling those pie shells with fruit or whatever filling, is therapeutic. It's a stress-reliever and like Beth says, pie really does heal and makes the world a better place. And I'm all for that.


Strawberry Crumble Pie

Ingredients:
For the pie dough:
1/2 stick butter, cold, cubed
1/2 cup shortening, chilled
1-1/4 cups flour
pinch of salt
1/2 cup ice cold water

For the filling:
2 lbs. (7 cups) strawberries, quartered
1 cup sugar
1/4 cup tapioca
pinch of salt

For the crumble topping:
1 cup flour
1/2 cup brown sugar
1 stick butter, cold, cubed

Directions:
To make the pie dough; add flour and salt to a large bowl, stir together. Cut in butter and shortening with a pastry blender, until mixture is pea sized lumps. Slowly add in ice water and either using hands or pastry blender, mix all ingredients together until dough forms into a ball. Be careful not to overwork the dough, it only needs to be moistened.

Lightly flour your work surface; roll out dough until thin. Carefully press dough into pie plate. Trim and crimp edges, then set in fridge while you work on filling.

To make the filling: Add all strawberries, sugar, tapioca and salt to a large bowl. Mix together well and let set for 20 minutes to let tapioca activate. Then pour into prepared pie plate.

To make crumble topping: Combine flour, brown sugar and chilled, cubed butter. Cut in the butter using the pastry blender, just until mixture is marble sized. You don't want it to become too fine or you'll have a big melted mess on top of your pie.

Distribute the crumble topping over the pie, piling on high and not pressing down.

Bake at 425 degrees for 15 minutes. Then turn oven temp down to 375 degrees and bake for another 30 minutes. Remove from oven to let cool. Serve with ice cream, if desired.

Friday, May 23, 2014

Slow Cooker Granola


Granola's always a favorite in our house, but we've been munching on it quite often this past week. The oldest daughter experimented one night with a new recipe and it turned out wonderful. It was a small batch and of course it was gone within two days.

It's also starting to feel more like summer here in Iowa, the weather has been perfect this week. Upper 70's and 80 degree temps, but this momma does not want to turn on the air just yet if I can help it. My heating bill was just outrageous during our winter that never wanted to end. With that said, I have been trying to not turn on the oven as much this week.


So I thought I would pull out the crock pot and make up another batch of granola for the kids' breakfasts. It worked out perfectly! I didn't have to heat up the house and could keep an eye on it while I worked on some other things. I stirred the mixture every 30 minutes, just to prevent it getting too brown at the bottom. Everything is dry and crunchy just the way we like it.


You can adapt your own favorite recipe to the crock pot as well, or use mine as your guide. I don't always make it the same, I like to use up whatever we have on hand. This batch was slivered almonds, dried cranberries, raisins and pineapple. Granola makes for a healthy snack or breakfast; enjoy with milk as a cereal, parfait style with yogurt or simply by the handful.


Slow Cooker Granola

Ingredients:
4 cups rolled oats
1 cup slivered almonds
1/2 cup coconut oil {melted}
1/2 cup honey
3 tbsp melted butter
pinch of salt
1 cup choice of dried fruit

Directions:
Add oats, almonds and salt to the slow cooker, stir together. In a small bowl, whisk together oil, honey and melted butter. Pour into the dry mixture and toss all ingredients together.

Cover, cook on high for two hours, stirring every 30 minutes. Pour granola out onto a large sheet of wax or parchment paper to let cool. Add in dried fruit and toss together. Let cool completely before storing in an airtight container.

Wednesday, May 21, 2014

My Favorite Kitchen Tools


Since I spend a lot of my time in the kitchen I thought I'd share with you today some of my favorite gadgets. It's hard to pick just a few, but these really are items that I use on a weekly, if not daily basis. They are ones that I absolutely love and think are a great foundation to the perfect kitchen!


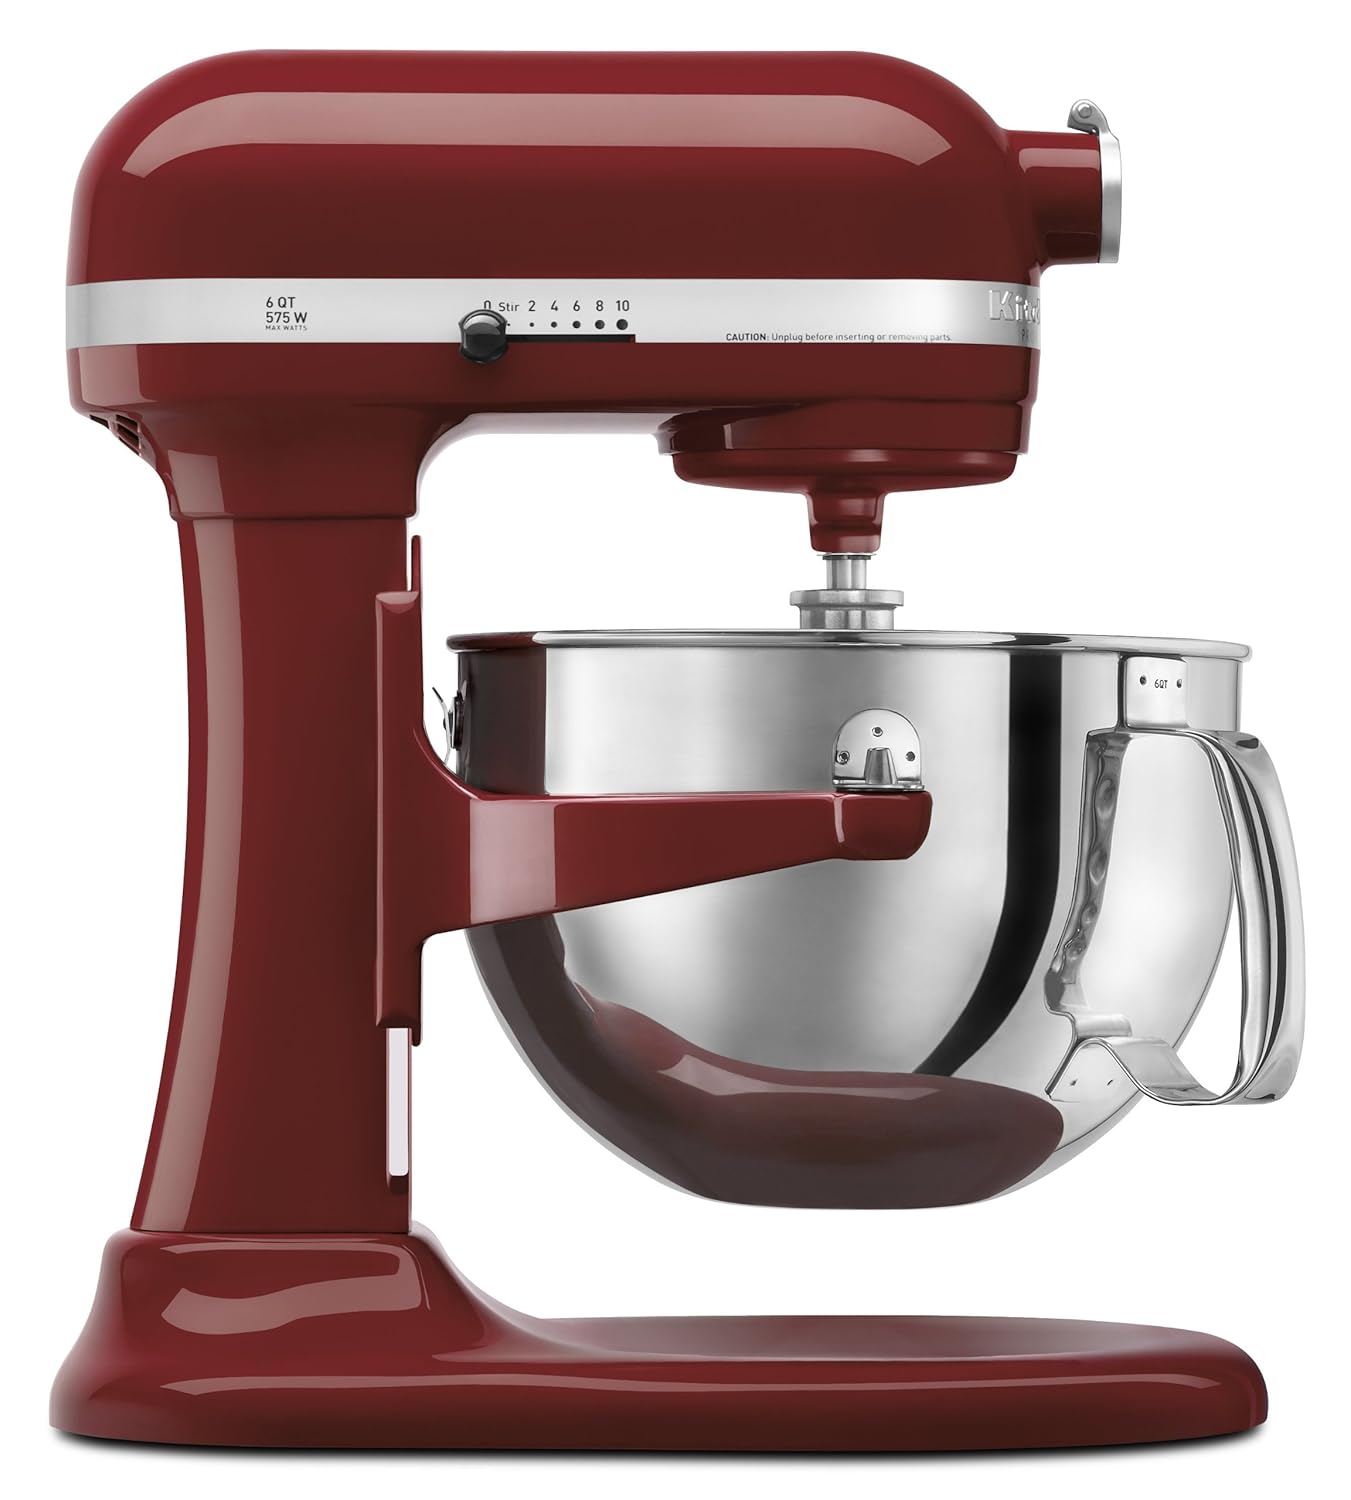
I honestly don't think I could live without my KitchenAid Stand Mixer. Now I have a bit larger model than most might purchase, with as many cakes/cupcakes as I bake, it helps to have a larger bowl for when mixing up my batters and buttercreams. When we make homemade pizza I mix up my dough right in the mixer. It's so easy and probably a lot of the reason why I prefer to make my own instead of ordering out.


When browning ground beef or pork I always, always use this Pampered Chef Mix n' Chop. It's one of the greatest inventions ever! You always get perfect little crumbles of meat and it beats using a wooden spoon any day.


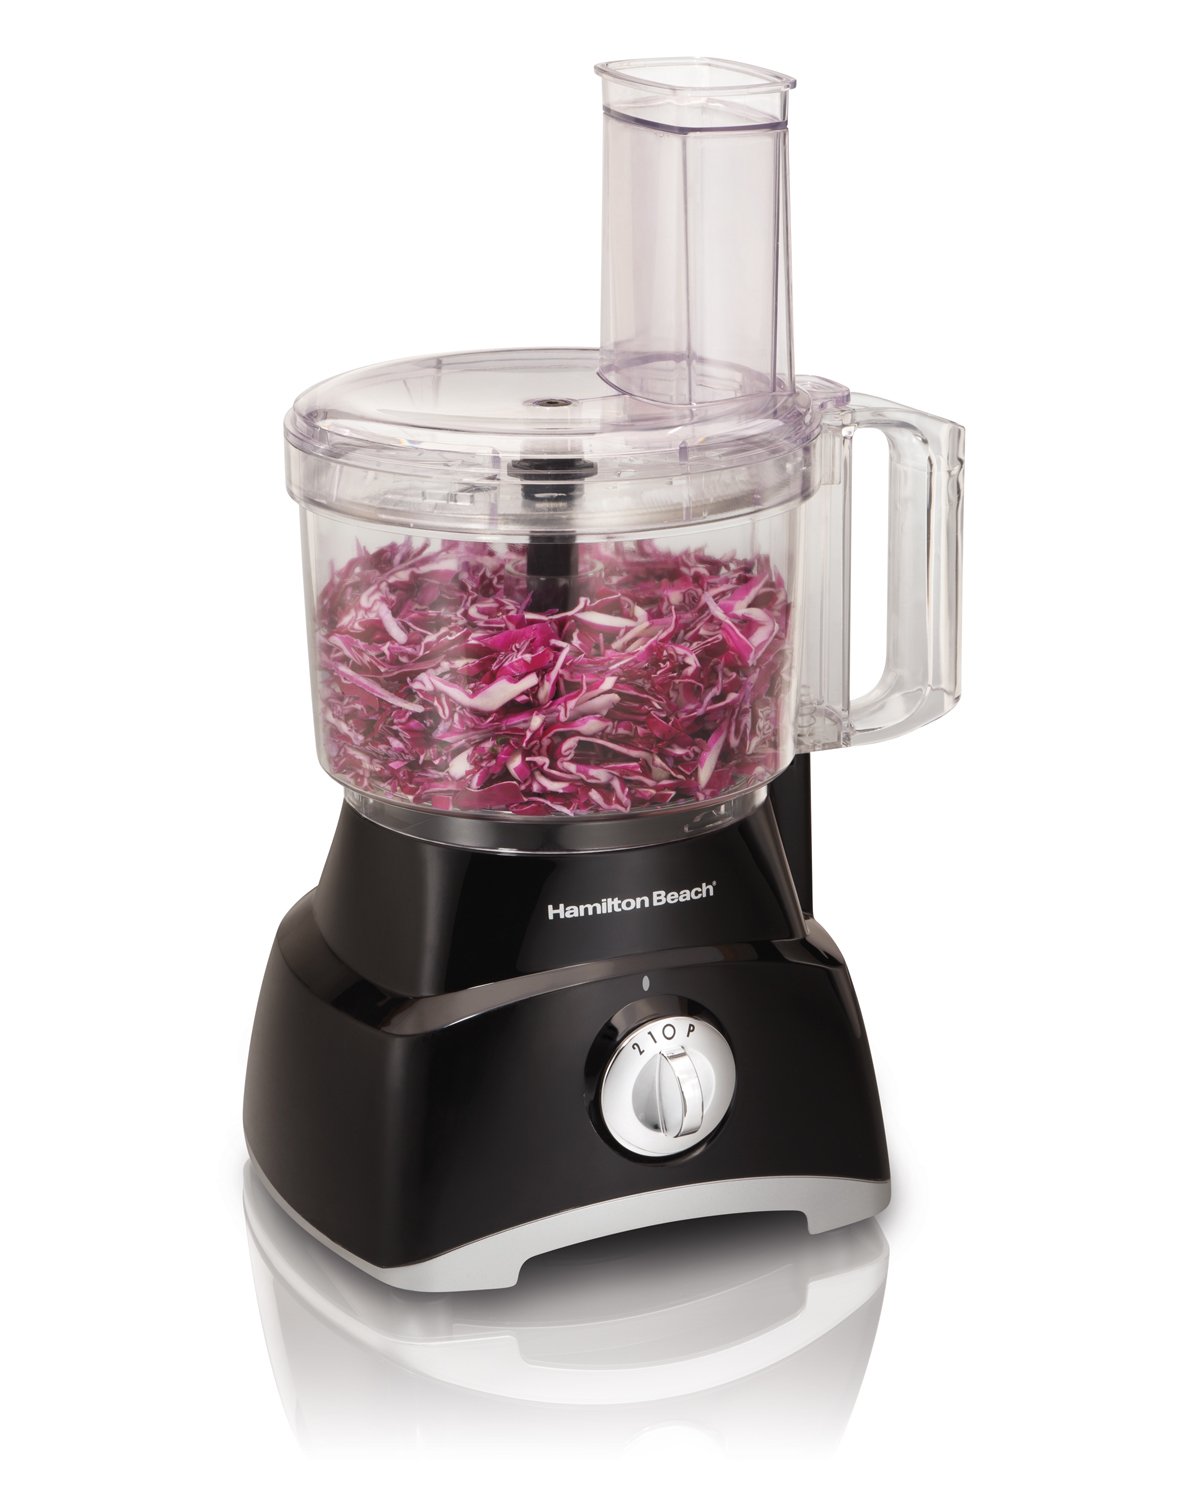
food processor is another must have in the kitchen. It might not be something you use even on a weekly basis, but it's definitely comes in handy. Now I don't have a fancy one by any means, this one here is only $28, a great price I think and will still get the job done. I love using mine when making salsa in the summer, it was a lifesaver last week when I had tons of pretzels to crush up for a crust I was making, you can use it when making your pie crust, shredding cabbage for coleslaw. Really the list can go on and on.


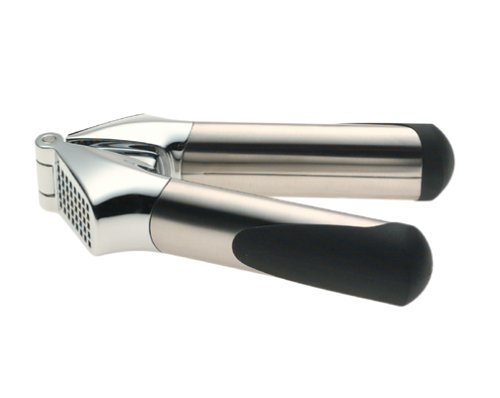
OXO SteeL Garlic Press, Stainless
I remember when I first starting cooking garlic intimidated me. It's hard to know exactly how to handle it. A good garlic press is helpful, I use mine a lot and I love cooking with garlic now.  I can simply put my whole garlic clove inside the press, press the two handles together and the garlic comes out all minced for me at the bottom. Then I just have to open up the press and remove the peel.


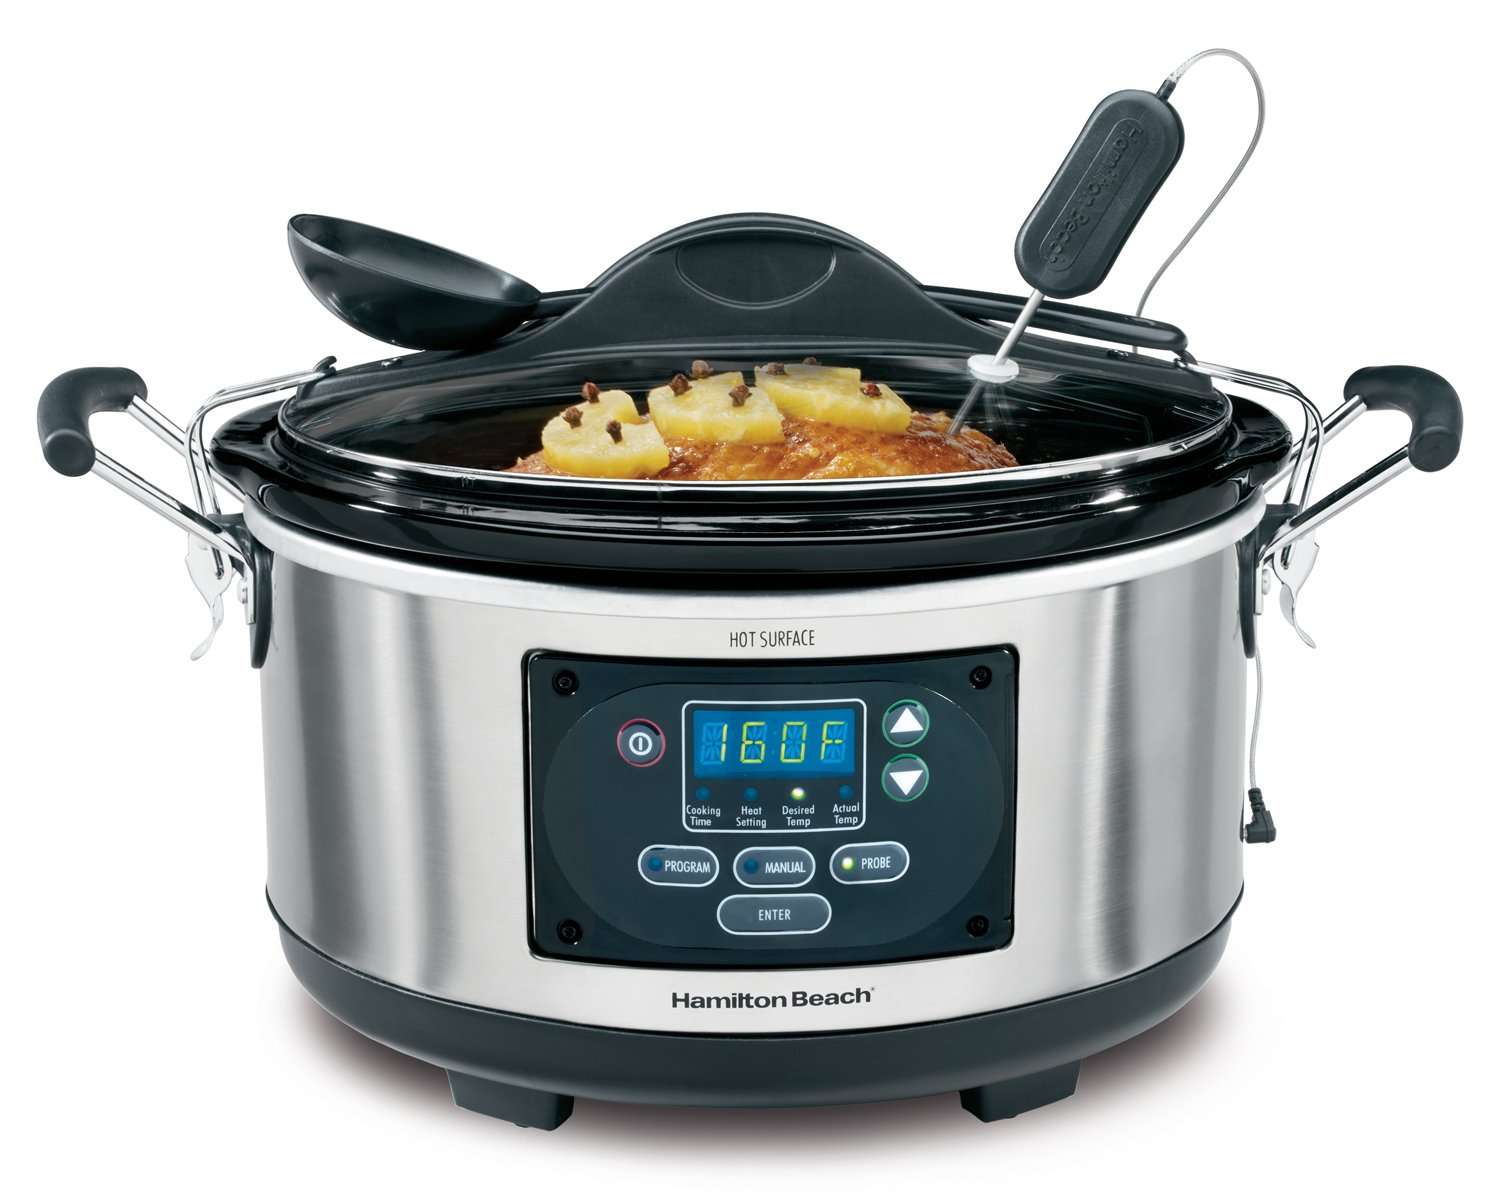
Crock pots, you've got to love em'! I use mine frequently throughout the year, we love having something to warm us up in the cold, winter months but they're also nice to use in the heat of the summer. I love not having to turn on the oven or cook on the stove top when it's so humid out. I've had a few different models and this one right here is my absolute favorite so far. I love the different heat settings and the fact that I can take this along to a party and not having to worry about a spill in the van. Ugh, I know exactly what that's like!

When it comes to baking, especially cookies, I swear by these silicone baking mats. I love this Wilton brand and also have one from the Food Network brand. I'm sure any other brands are fabulous too. There's no more worrying about your cookies sticking to the cookie sheet and crumbling apart. They ease right off and clean up is a breeze.


Having a good pair of kitchen shears comes in handy, especially when cutting chicken for homemade chicken strips or cutting the little ones' pancakes into small bites for them. There are so many uses for these and it's a good idea to have them stocked in your own kitchen. I've personally always used the Pampered Chef brand and have always been pleased with their quality.


I know there's probably plenty more I can add to this list, but I'm interested in hearing what your favorite kitchen tools are? Tell me below in the comments!

Monday, May 19, 2014

Homemade Strawberry Sauce


Whew, what a whirlwind of a weekend we had! It was busy nonetheless, but they sure were an amazing few days. I shared a pic on Facebook yesterday morning of the cake and cupcakes I made for my cousin's wedding on Saturday. It was quite the fairy tale wedding, everything was beautiful and absolutely perfect.


Yesterday I don't think we sat down until late evening and then everyone simply crashed for the night. We had a very productive day after church; tackled the dreaded swimsuit shopping with three girls, got a bunch of yard work done, planted the garden and cleaned up the house a bit. I feel like I'm dragging a bit today so I have a feeling it will be another early night in our house.

In baking and decorating cakes and cupcakes, I tend to make a lot of this strawberry sauce. It's one of the most amazing things ever. I love to fill vanilla cakes with it, I'll spread a very fine layer of buttercream, just to prevent the sauce from soaking into the cake. We want that to stay so you can really taste how wonderful it is. Then I'll slather on the chunky, strawberry filling on top of the buttercream and then top with another cake layer.


One of my favorite cakes to make is this particular one. It's filled with the strawberry filling, iced in vanilla buttercream and then topped with fresh, sweet strawberries. It's really good and always goes over well at parties.


But besides layered into cake or spooned on top of my strawberry pretzel cupcakes {I promise to share this recipe soon!}, the hubby and I have been brainstorming different ways to enjoy it. Of course it's good on top of ice cream, just like a strawberry sundae.  In the summer, angel food cake is always a favorite. Strawberry shortcake anyone? Or my favorite idea yet, the perfect topping to cheesecake. One I'll definitely have to try this summer, once I get my hands on more strawberries from the local farm.

However you decide to indulge yourself; by the spoonful, layered into your birthday cake or a simple ice cream sundae. Take advantage of strawberry season coming up. I preserve lots of berries just for this purpose, throw a few extra bags into your freezer too. You'll thank me later!


Homemade Strawberry Sauce

Ingredients:
3 cups strawberries, fresh or frozen, sliced
3/4 cup sugar
3 tbsp cornstarch
1 cup water, divided

Directions:
In a saucepan, combine strawberries, sugar and 3/4 cup of water. Stir together well and cook over medium heat until almost boiling. Depending on the size of your berries, I like to mash the fruit a little bit as it's cooking. Mix together cornstarch and remaining 1/4 cup of water. Add to the pan, stirring constantly until boiling and thickened. Remove from heat. Let cool before using.

Use to layer in between cakes, for strawberry shortcake, topping for dessert waffles or on ice cream. Store extra sauce in the fridge.


Wednesday, May 14, 2014

Sweet Potato Hash


This might not look like your typical child's lunch, but I have to say I've always prided myself on what I serve to my daycare kids. Now, I am far from perfect. We've had the occasional mac and cheese but I really do try to stay away from that stuff. I figure if I don't want to eat it, why should I force them to?

I didn't do any prep work ahead of time, like I normally might do, and still had lunch on the table within 30 minutes. I don't provide care for a large group, I've always liked to keep mine on the smaller side. But four kids is still four kids and I understand that it's not always easy.


Here I made use of ingredients we had on hand. A very simple dish, nothing complicated. I think the sweet potato and ground pork go very well together and bell peppers are always good in just about anything. I added a little bit of cinnamon and paprika for seasoning, then placed a fried egg on top. Of course on the kids' plates the egg was on the side and they had some fresh raspberries too.

Everyone ate really well. Of course they all have their dislikes. One doesn't really like peppers but always tries a bite. Another one didn't really eat much of the sweet potato. And that's totally okay with me! At least they're trying new things and who knows, one day they just might love that particular food.

I, on the other hand really enjoyed this dish. I think it works well for lunch or dinner, but maybe even for breakfast. Why not? Plus if you're following a gluten free or paleo diet, this would be a perfect meal to add to your repertoire.


Sweet Potato Hash

Ingredients:
1/2 lb. ground pork
2 medium sized sweet potatoes
1 bell pepper, diced
1/2 tsp paprika
1 tsp cinnamon
fried egg, to top each serving

Directions:
Preheat oven to 375 degrees. Wash potatoes and cut into small cubes. Throw onto a cookie sheet greased well with coconut oil. Roast in the oven for 20-25 minutes, until softened. Using a spatula, make sure to turn potatoes at least once while cooking.

Meanwhile, in a medium skillet, brown ground pork until no longer pink. Drain any grease and return to skillet. Add in diced bell pepper and let cook over low heat. Sprinkle in seasonings and stir well to combine.

Once sweet potatoes are cooked through, add those into the skillet. Let cook on low to keep warm while you prepare the eggs to serve on top.

Monday, May 12, 2014

5 Things I'm Loving Right Now


I hope all of you moms enjoyed a very nice Mother's Day yesterday. The weather wasn't the greatest in our parts but Saturday was the perfect day. My hubby was out of town most of the weekend for state bowling, but the girls and I had a very productive Saturday. We made trips to both of the farmers' markets in town, grabbed some green onions, asparagus and flowers. So we planted those right after lunch, got the little ones' room cleaned up, did some baking for the upcoming week and ran a few more errands. I was definitely tired by evening as were they, the youngest two were both in bed by a little after 7.  I definitely enjoyed that!

It's been a little while since I've done a post like this, so relax and let's talk a bit.

10 Secrets to Having a Successful Garage Sale

Summer is just around the corner and that's usually prime time for garage sales. In fact I've been seeing quite a few around town already. I'm starting to prepare for probably the largest one I will ever hold in my life, seriously! After doing daycare in my home for several years, I've acquired tons of items. The bad thing is, I've been pretty good about weeding through our possessions throughout the years and continuously taking things into the consignment shop, but there's still so much. Anyhow, I love this post by Crystal from Money Saving Mom. She's got some really good tips on how you can make your garage sale a success.


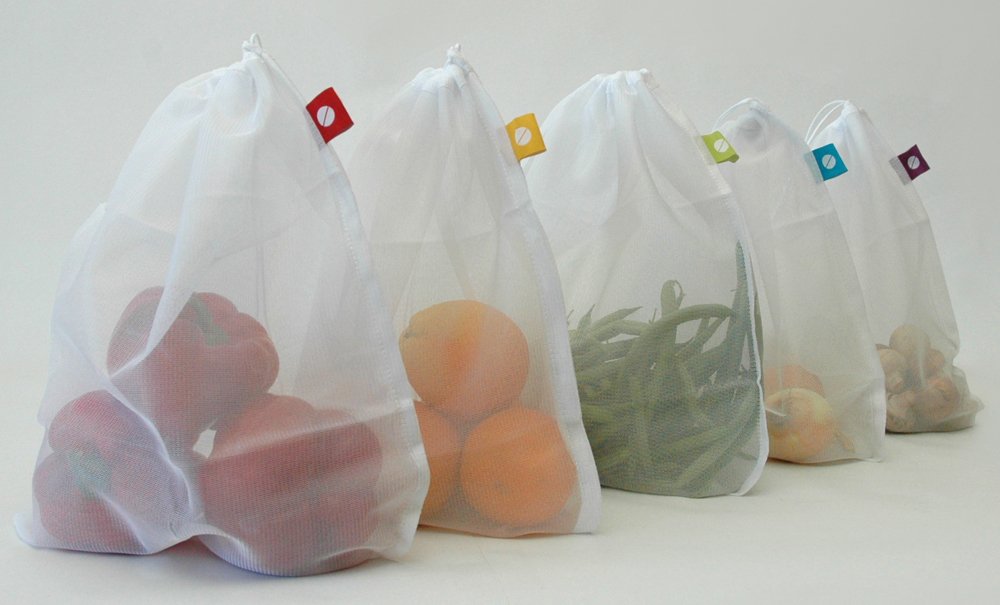
I have been in love with these reusable produce bags  for quite some time now. It's probably about time I order some for myself. Our CSA will be starting up at the beginning of June and I bet these would be great to store our produce in, or even take along to the farmer's market and grocery store.

texasroadhousecenter

Texas Roadhouse is one of my favorite restaurants in town. In fact I remember we had one in our hotel while on our honeymoon several years ago. We ate there way too much during that week! I'm intrigued to try these copycat rolls, they look just the same. I bet they taste amazing!


I really like this fun way to display the kids' chore chart. We've been talking with the girls a little more about how they'll need to pitch in more around the house throughout the summer and going forward. I clearly remember having to help mom and dad clean growing up, so I don't think it will kill them to do a few more things each week.


Memorial Day is coming up soon. I love getting together with friends and family for barbecues and picnics outdoors. Trifles are great to make this time of year. You still get a sweet dessert, but it's a bit lighter. Plus I love taking advantage of all those berries in season!

Saturday, May 10, 2014

Freezer-Friendly Breakfast Burritos


I love having items like these in the freezer, within arms reach for busy mornings or when mom just doesn't feel up to cooking so early. The family doesn't mind, in fact these are one of their favorites. Simply reheat in the microwave, toaster oven or your regular sized oven and breakfast is served. Simple, I like that!

Since we had a change of plans in our dinner a few nights ago and I already had this bacon thawed out. It made sense to make up a big batch of these. I don't always use bacon either, a lot of times if will be a mild breakfast sausage or even some diced ham. I love adding bell peppers to mine but I know the hubby and some of the girls don't like them cooked. You can use whatever veggies you prefer, maybe some mushrooms.


Then you'll want to top with cheese and roll them up. Wrap each one individually in foil to prevent freezer burn. Stack them all neatly in a large Ziploc bag, label with contents and date. And voila, you've got yourself some breakfast burritos ready to be enjoyed at a moments notice.


Freezer-Friendly Breakfast Burritos

Ingredients:
scrambled eggs with or w/out desired veggies cooked in {peppers, onions, mushrooms work well}
choice of meat- crumbled bacon, diced ham or sausage
grated cheddar cheese
flour tortilla shells
foil
freezer bags

Directions:
Lay tortillas out onto a clean counter top. Spread a small amount of scrambled eggs down middle of tortilla. Top with meat and cheese. Roll up burrito style. Wrap each one individually in foil. Place gently into a large freezer bag. Label with contents, date bag and then store in the freezer until ready to use.

When ready to use; you may remove and store in fridge to thaw overnight if desired. Otherwise simply reheat burritos while frozen, in the microwave it should take about 2 minutes. If you heat in the oven, about 5-6 minutes.


Thursday, May 8, 2014

Healthy Fruit {or Veggie} Dip


Gosh it's been absolutely gorgeous outside this week! The temps are rising, we haven't had days on end with rain and the kids are able to run around outside enjoying it all. My favorite times of the year are both spring and summer, and a large part of it is because of the fresh produce available. We tend to eat lighter meals and they are centered around those ingredients grown in the garden.

I've always said my kids are big fruit eaters and have become much better veggie eaters in the past couple years. Our snacks are mostly whole foods like that and not so much of the cracker, goldfish, sort of thing. So this plate above is something they adore.


I remember when I first started my in-home daycare back in August of 2006, I mainly had before and after school kids. I knew all of their parents and their daughters were all friends with mine. Their favorite snack would be a tray like this. Except I would just throw a container of yogurt in there for the dip, particularly an orange flavored one. Fast forward to today, I try to stay away from those kinds. They tend to have artificial sweeteners and other junk in there that I don't particularly like.

But this I can feel good serving to my daycare kiddos and my own as well. I've added in my own sweetener, honey. Plus a little something extra. This particular time I went with a scoop of biscoff cookie spread. It really doesn't have any more calories or fat than peanut butter, in fact it has just a little bit less. But peanut butter or any sort of nut butter would be a great alternative. It's just a fun way to change up their fruit or even a veggie tray.


Yes, even veggies. I seen particular kids scarf them down way better than I've ever seen before. I need to remember that for next time, maybe sneak some bell peppers or kohlrabi in there. Something about a dip just makes it that much more fun to eat.


Healthy Fruit {or Veggie} Dip

Ingredients:
6 oz. container plain or vanilla Greek yogurt
1 tbsp biscoff spread {or any nut butter}
drizzle of honey

Directions:
Mix all ingredients together well in a small bowl. Chill in fridge ahead of time for best results but you may certainly serve right away with desired fruit and veggie slices.

Monday, May 5, 2014

Ally's Virtual Baby Shower


Today it's all about babies, baby girls to be specific and of course good food! Yudith from Blissfully Delicious and I are hosting a virtual baby shower for our good friend Ally over at Ally's Sweet and Savory Eats. Ally is due with her third baby any day now and it's girl #2 for her family. We are all so happy and excited for her, and it's with great pleasure that I introduce you to some amazing Iowa food and lifestyle bloggers that helped in planning this little party!


Michelle from Simplify, Live, Love is starting us off with these gorgeous looking strawberry yogurt cupcakes. Michelle lives in the same town as Ally, where her family is building their own passive house. It's an awesome story and I think you'll love following along their journey too.  It won't be long before strawberry season is here in Iowa, what a perfect summer treat these cupcakes would be!


Kierstan of Life in Iowa brings us this beautiful Lemon Poppy Seed Cake with Fresh Lemon Curd. I had the privilege of meeting Kierstan back in November at our Iowa Blogger Meet-up, she's quite the amazing baker and has a fabulous dream of opening her own bakery some day. You'll definitely want to make this cake.


Finally, I have brought a rich, decadent chocolate cake to the party. I first made this over a year ago for my godmother's birthday. It reminds me of a cake that my own grandma would make growing up, unfortunately I never got the recipe from her but I think it's pretty darn close. I especially love the fluffy marshmallow frosting, it compliments the cake quite well.


Now it's time for you to head over to Blissfully Delicious and see what everyone else brought to the party! I think we've definitely got Ally's cravings covered here today.


Devil's Food White-Out Cake

Ingredients:
1-1/3 cups flour
1/2 cup cocoa powder
3/4 tsp baking soda
1/2 tsp baking powder
1/4 tsp salt
10 tbsp butter, softened
1/2 cup packed brown sugar
1/2 cup sugar
3 eggs
1 tsp vanilla
2 oz. unsweetened chocolate, melted and cooled
1/2 cup buttermilk
1/2 cup boiling water
2/3 cup mini chocolate chips

For the frosting:
4 egg whites
1 cup sugar
1/4 tsp cream of tartar
1 cup water
1 tbsp vanilla

Directions:
Lightly spray grease two 6x2-inch round cake pans and set aside. Preheat oven to 350 degrees.

In a large bowl cream together butter and both sugars until light and fluffy. Add in eggs and beat in well. Mix in the vanilla. Reduce speed to low and mix in melted chocolate.

In another bowl, whisk together flour, cocoa powder, baking soda, baking powder and salt. Once the chocolate is fully incorporated, gradually add in dry ingredients to the cream mixture, alternating with buttermilk. You should start and end with the dry ingredients. Batter will be thick at this point. Slowly add in boiling water, then fold in chocolate chips.

Divide batter between the two prepared pans. Bake for 35-40 minutes or until a toothpick inserted in middle comes out clean. Remove from oven and let cool for at least 15 minutes before trying to remove from pans.

When cakes have cooled completely, using a serrated knife and a gentle swaying motion, carefully remove the top crown of each cake. Then again using same technique, slice cakes in half.  Set aside until ready to assemble.

To make frosting: Add egg whites to a dry mixer bowl. Make sure to have a candy thermometer close by.

Put sugar, cream of tartar and water in a small saucepan, stir to combine. Bring mixture to a boil over medium heat, cover pan and let boil for 3 minutes. Uncover and continue to let boil until syrup reaches 242 degrees on the candy thermometer. While syrup is cooking, start beating the egg whites.

Once the thermometer reaches 235 degrees, start beating egg whites on medium speed with the whisk attachment. Once egg whites form stiff, shiny peaks reduce speed to low, slowly pour in the hot syrup, making sure to pour in between the beater and side of the bowl. Don't worry if you get splatters on the sides of the bowl, just keep going. Add in vanilla and keep beating whites at a medium speed until they cool to room temperature, about 5 minutes. You'll then have a smooth, shiny, marshmallow frosting.

To assemble cake: Place bottom layer of cake onto a prepared cake board or platter. Using a long spatula, cover the layer generously with frosting. Top with a second layer of cake, again add more frosting. Repeat with a third layer of cake. Finish with the final fourth layer of cake. Frost sides and top of cake, don't worry about getting the frosting completely smooth.

Crumble the top crowns of cake that you set aside from earlier. Cover the entire cake with the chocolate cake crumbs, pressing gently into the filling and using your fingers. Cover cake loosely and chill in fridge for at least one hour or overnight if you have time.

Slightly adapted from: Baking: From my Home to Yours

Friday, May 2, 2014

DIY Bacon Cheeseburger Hamburger Helper


When I first moved out on my own I don't think I really knew how to cook much. I've always loved both baking and cooking, but I admit I ate my fair share of convenience and packaged foods. My husband and I had our oldest daughter when we were both sophomores in high school; my mom recently told me she was a little worried about what we would be eating on a daily basis when we did finally get a place of our own!

Hamburger helper wasn't something I really ever liked, but because it was cheap and didn't involve much preparation, I do recall making it every so often. But things have changed, I've grown up, matured and my food views have changed a lot.

Fast forward to today, I honestly don't think I could even choke down hamburger helper. But this homemade version, not that's another story. It's made with real ingredients and flavored with real spices instead of preservatives. What's better yet is I was able to use up some leftover ground beef and bacon that we had sitting in the fridge. Yay for not wasting!


DIY Bacon Cheeseburger Hamburger Helper

Ingredients:
1/2 lb. ground beef
4 slices bacon
1 garlic clove, minced
1 tbsp  butter
1 tbsp flour
2 cups milk
1/2 cup water
3 cups elbow macaroni, cooked al dente
2 tsp chili powder
1 tsp oregano
2 tsp paprika
1/2 tsp garlic powder
salt and pepper, to taste
1-1/4 cup Monterrey and cheddar cheese, grated


Directions:
In a large skillet over medium heat, cook bacon slices until crisp. Remove to a plate lined with paper towels to drain grease. Add in garlic and let saute for about one minute. Then add in ground beef and let cook until no longer pink and crumbled. Drain and then set aside.

In the same skillet, melt butter and then add in flour. Stir together well and let cook for a minute. Then whisk in milk and water.

Crumble bacon. Add pasta, hamburger and bacon into skillet and stir to combine. Add in all spices, then sprinkle with cheese and stir until melted through. Taste and add in additional seasonings if needed. Serve warm with additional cheese or bacon if desired.

___________________________________________________

We've got quite the exciting evening going on in our house. Our oldest daughter will be off to her 8th grade dance and I keep thinking where does the time go, she can't possibly be old enough for all of this. While the rest of us will be attending an end-of-the-year bowling banquet for the other two girls. Our first grader will be graduating tonight to the next level, sporting a cap and gown and all! I'm sure some pics will follow in the next few days.

Also, stay tuned for a virtual baby shower on Monday! Some fellow Iowa bloggers and I are hosting a shower for our friend Ally from Ally's Sweet and Savory Eats. She's due any day now with baby #3, a girl! I'm so excited and can't wait to share all of these amazing goodies with you. Have a great weekend!
Related Posts Plugin for WordPress, Blogger...